

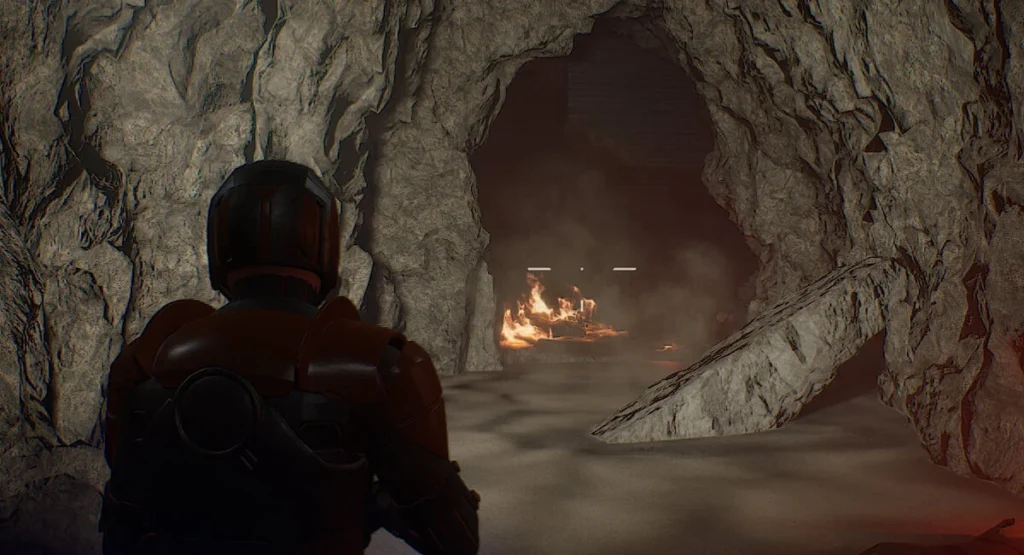
Station 24’s hook is simple: it’s a Bene Gesserit-themed maze in near-total darkness, packed with rubble, fire hazards, and quicksand. If you’re running it for the first time, the navigation is the hardest part. Once you’ve learned the route, it becomes a fairly consistent clear.
Estimated time: ~25–30 minutes (longer on higher difficulties)
Overall difficulty: Easy (route knowledge matters more than mechanics)
Core challenge: 2 lock-ins + final boss
Testing Station 24 Layout Overview
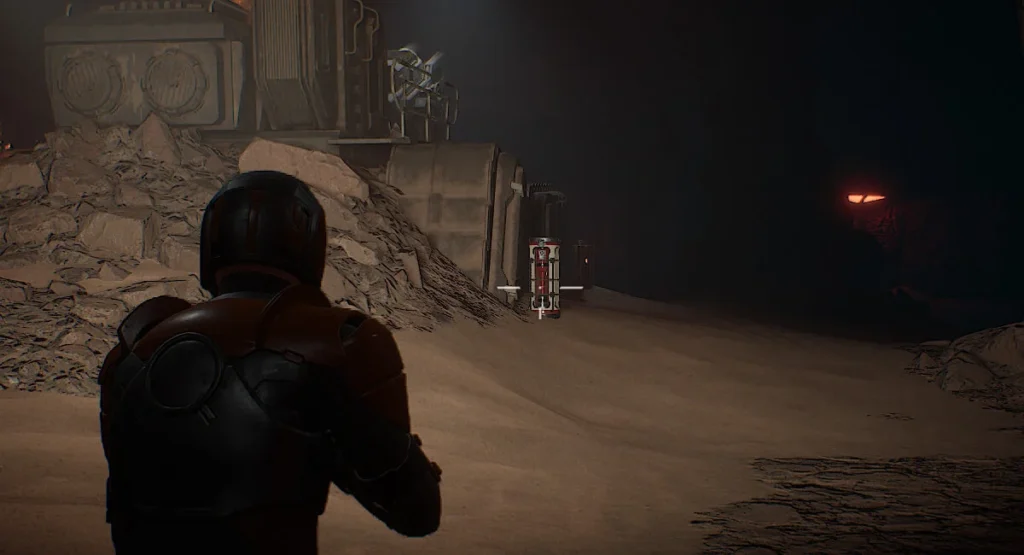
Testing Station 24 is basically a dark warren that funnels you through:
- Entry chamber → corridor navigation and hazards
- Lock-in Room 1
- Mid tunnels + optional side doors
- Lock-in Room 2
- Final tunnel → Boss Room
Navigation notes
- The space feels bigger than it is, but the “correct” route is fairly direct.
- Expect quicksand patches that punish careless movement.
- The station uses darkness as a mechanic—visibility is a real limiter until you bring the right tool.
Preparing for Testing Station 24 (Dark)
Before you go in especially if you plan to push higher difficulty levels—bring:
- Personal Light (mandatory; without it you’ll be functionally blind)
- Bandages and/or Medkits (you can find some inside, but don’t rely on luck)
- Durable gear (attrition adds up, especially if you get slowed into hazards)
- Enough water in your Literjon to stay optimally hydrated (stamina matters here)
- Cutteray for optional loot doors (recommended for farming runs)
Best weapons for a clean clear
- A shotgun or a reliable close-range setup works well overall.
- Melee is viable if you’re comfortable with blocks/parries and spacing.
Walkthrough — Section 1 (Up to and including First Lock-in)
- Enter the first chamber (intro hologram area)
- Move straight through to the far end, turn right, then hit the button to open the next door.
- After the door:
- Turn left
- Use Suspensor jump / glide to cross the first quicksand patch
- Turn right as you reach the next corridor
You’re now at Lock-in Room 1.
Lock-in Room 1: What to expect
This lock-in looks huge, but it’s actually straightforward:
- Three small enemy waves
- Includes a couple of heavier enemies, but nothing complex
Optional loot door (Cutteray)
There’s typically an optional Cutteray-locked door on the left side (from the entry perspective). If you’re farming mats, it’s worth the detour.
Once the waves are cleared, the shield door unlocks—move through.
Walkthrough — Section 2 (Up to and including Second Lock-in)
After the first lock-in:
- Turn left
- Use Suspensor jump / glide across a larger quicksand patch
- Watch the right-hand side—there’s often another optional Cutteray door for supplies like ammo/medkits/materials
Continue down the corridor to reach Lock-in Room 2.
Lock-in Room 2: Enemy waves and tips
This one is slightly more active than the first. To trigger the first wave, you’ll clear roughly 8–10 Subies (unarmored melee enemies).
Typical wave flow:
- Wave 1: Clear the initial Subies to start the lock-in properly
- Wave 2: 2 normal enemies + ~6 Subies
- Wave 3: 3–4 normal enemies
Helpful behavior: Subies and normal enemies may fight each other if you let them—use that to your advantage.
Explosive canisters warning:
There are explosive barrels/canisters around the room. They can help you clear waves quickly, but the blast radius is huge, so don’t “win” the fight by deleting your own health bar.
After the second lock-in, push through the newly unlocked shield door and follow the tunnel to the boss arena.
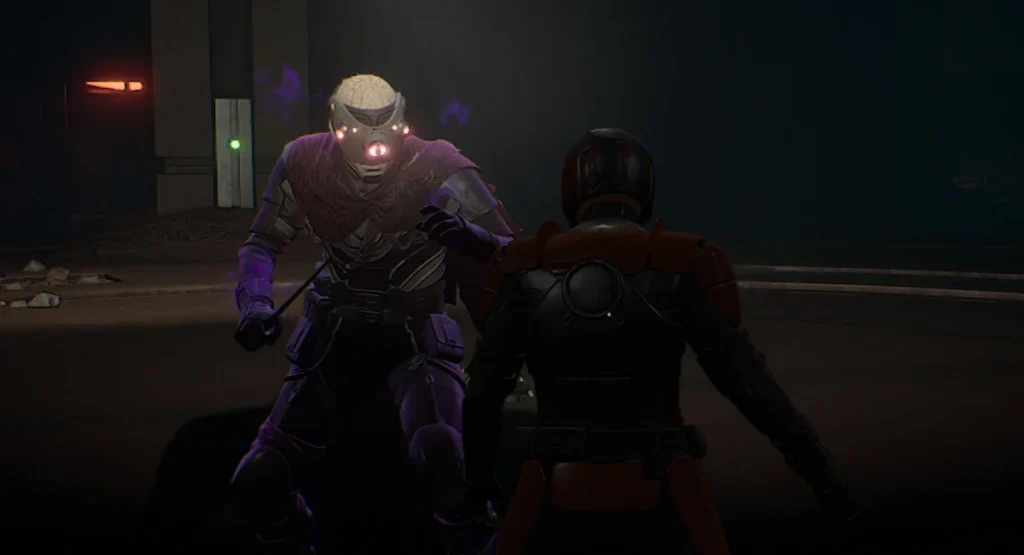
Boss Guide — Doctor Lemenger (Testing Station 24)
Overview
Doctor Lemenger uses a Bene Gesserit-style kit and a short blade for fast pressure. The good news: his offense is very manageable if you’re comfortable with:
- Blocking
- Parrying
- Dashing to reset spacing
Recommended approach
- Shotgun or melee both work well.
- He’s easily staggered, and he frequently leaves openings after aggressive moves.
- Slow, heavy melee swings can punish him when he commits.
Phase 1: Basic Abilities
In Phase 1, watch for three main moves:
Bindu Push
- A straight-line energy bolt
- Moderate damage and can pierce shields
Counter: sidestep/dash off-line; don’t eat it while stationary.
Alpha Strike
- Teleports behind you and attacks immediately
Counter: expect the reposition; quick turn + block/parry, or dash to deny the follow-up.
Bindu Blast
- A close-range AoE that applies a debuff draining energy when you dash
Counter: back out as soon as you see the tell; don’t panic-dash repeatedly if you get tagged.
Once you learn the rhythm, Phase 1 is mostly “stay calm, punish openings.”
Phase 2: Vanish
Lemenger gains Vanish, turning invisible until he chooses to strike.
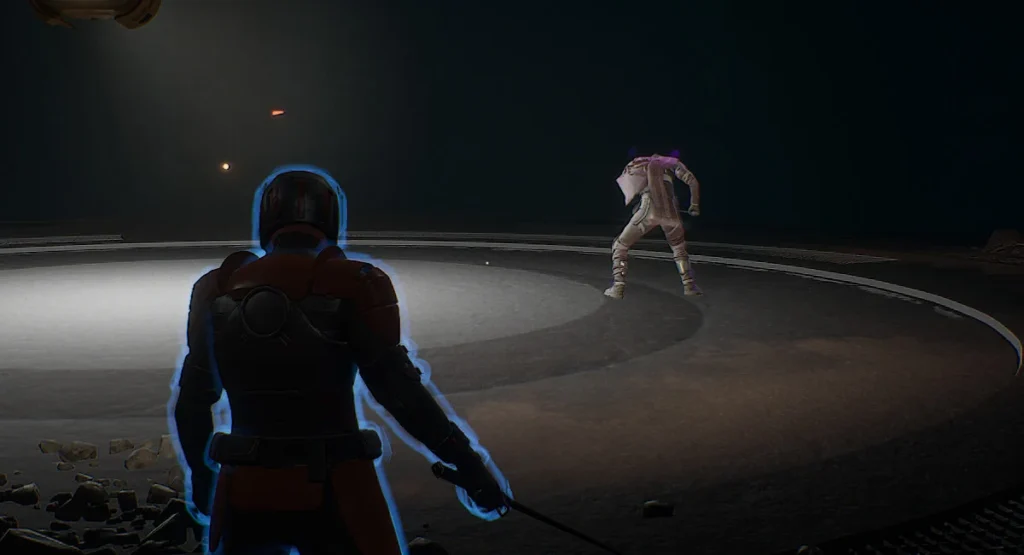
You have two reliable options:
- Play it safe: wait for his attack tell, then dash away and punish the recovery
- Force him out: hit the light switches around the room to reveal and stun him
Tip: If you’re farming fast clears, learning light switch positions speeds the fight up dramatically.
Phase 3: Adds
At the start of Phase 3:
- Lemenger summons 4 melee Subie adds
- He teleports away and heals slightly
- Then he continues using the same core kit
How to handle adds
- If you’re confident, keep pressure on Lemenger and cleave adds when they clump.
- If you want consistency, delete adds first so you don’t get clipped while watching for Vanish.
Loot Notes (what to prioritize)
Testing Stations are a key part of the Chapter 3 endgame loop, especially if you’re hunting:
- Strong weapons/armor upgrades on higher difficulties
- Augmentation-related progression (schematics/patterns depending on the station’s reward pool)
For Station 24 specifically, the best “efficiency win” is mastering the route + hazards so you arrive at lock-ins with full resources and reach the boss quickly.