

Augmentations are a Chapter 3 endgame system in Dune: Awakening that lets you “mod” weapons and armor for major power gains — with one important tradeoff: your item’s maximum durability goes down. If you’re coming from the base Skills and crafting loop, Augments can feel like an entirely different layer of progression, especially because they tie into Testing Stations, Landsraad missions, and Specializations.
This guide explains how to unlock Augmentations, where to get the blueprints, what materials you need, how crafting works, how to equip them, and what to prioritize first.
How to Unlock & Equip Augmentations
Augmentations are designed for late game. To meaningfully engage with the system, you need to be at Plastanium (MK6) tier, because:
- Augments can only be attached to Plastanium-tier items
- You equip them using a Plastanium-tier structure (the Augmentation Station)
Here’s the full loop in plain English:
- You find Augmentation schematics in Challenge Mode Testing Stations
- You craft Augmentations using an Advanced Weapons Fabricator or Advanced Garment Fabricator
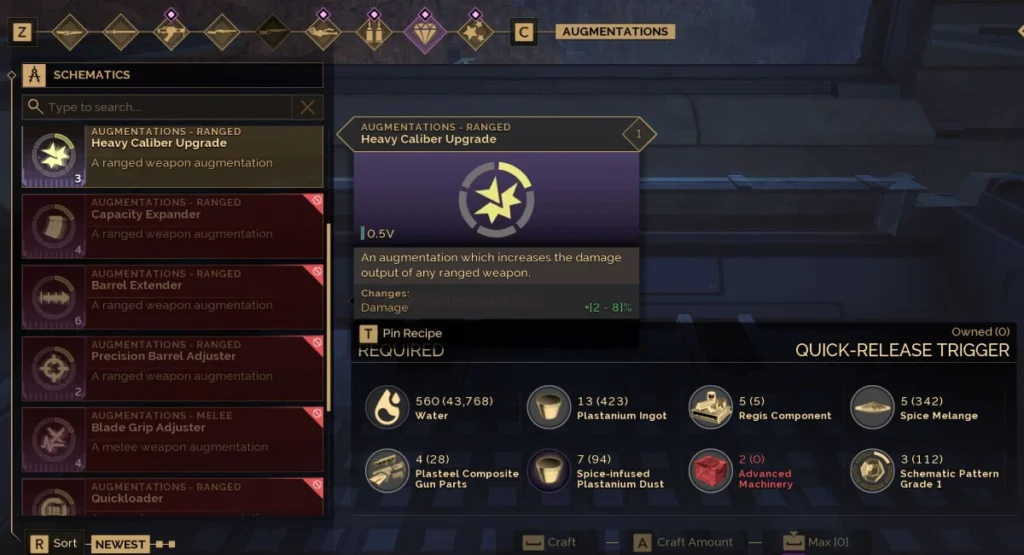
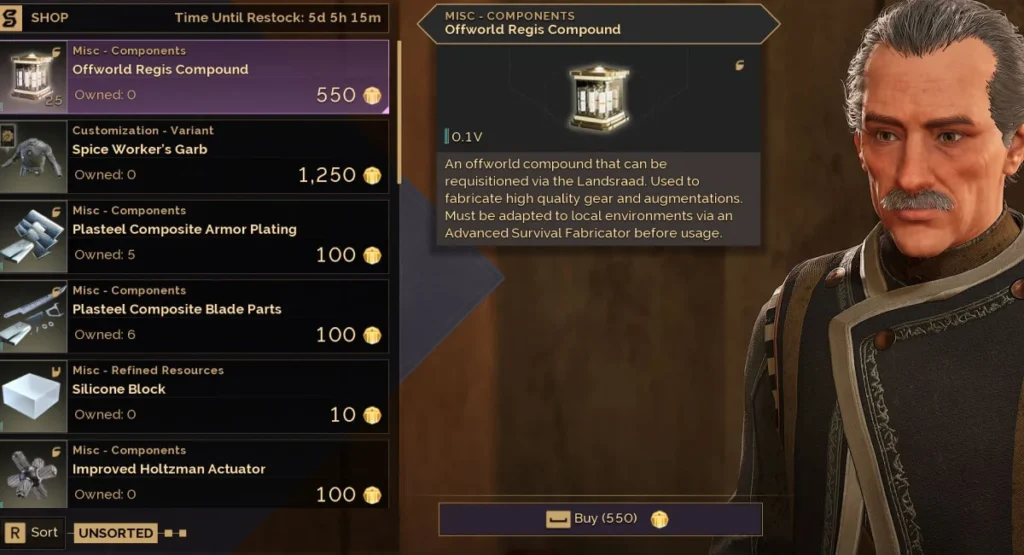
- Crafting requires two “special” inputs: Schematic Patterns (from Testing Stations) and Regis Components (made from Offworld Regis Compounds)
- You buy Offworld Regis Compounds with House Scrip from Landsraad Missions
- You convert Offworld Regis Compound → Regis Components at an Advanced Survival Fabricator
- Your total Augmentation slots per item depend on your Crafting Specialization tree
- You slot Augmentations into gear using the Augmentation Station
Obtaining Augmentation Blueprints / Schematics
Right now, Augmentation blueprints (schematics) come from Challenge Mode Testing Stations.
- Testing Stations are accessed via the Overland Map
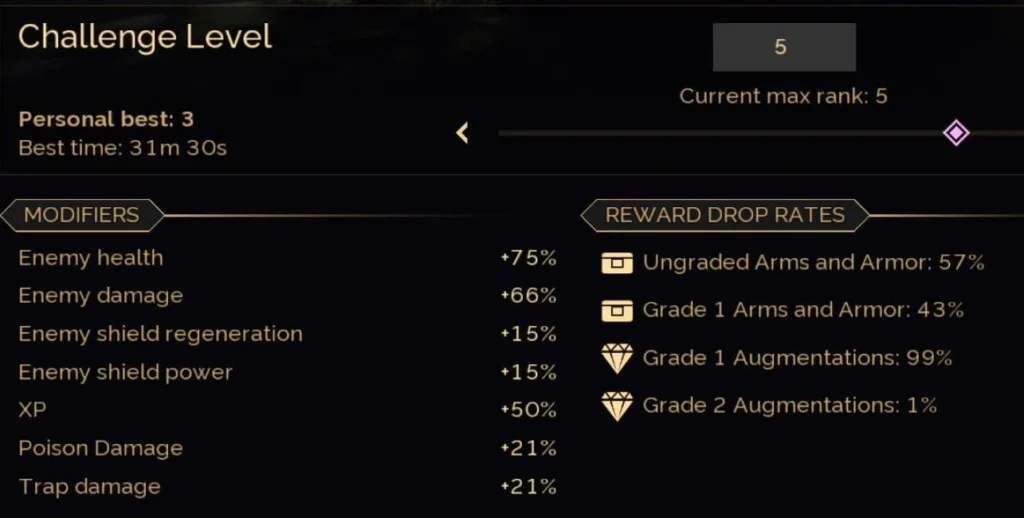
- You can run them at increasing difficulties from 1 to 100
- Rewards reportedly cap in quality around level 40, with higher levels mainly increasing difficulty rather than improving the reward ceiling
Practical takeaway: higher difficulty generally means better odds at higher-grade Augmentation schematics — but there’s a point where the extra difficulty may not be worth the marginal gain if your build isn’t ready.
Crafting Augmentations
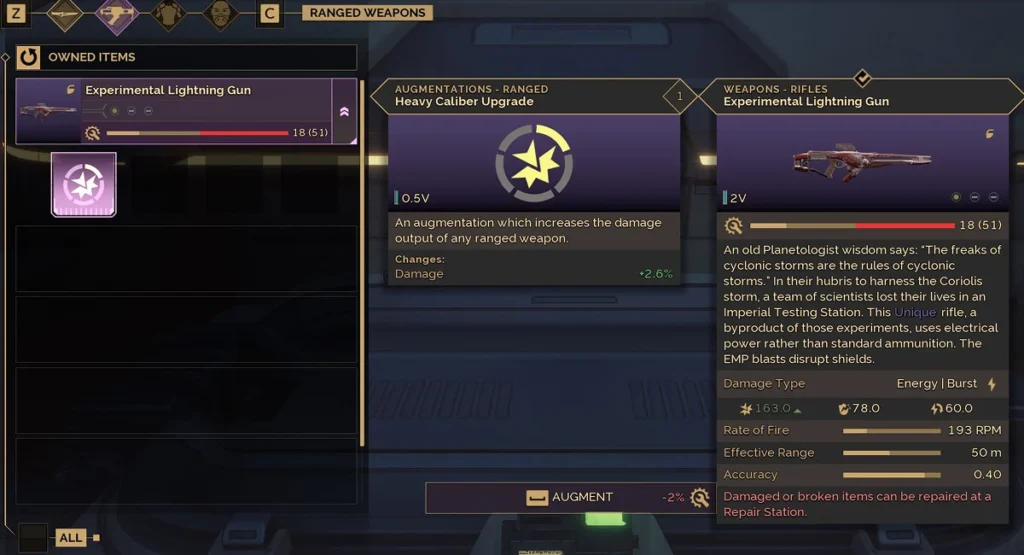
Once you learn a blueprint, you can craft that Augmentation — with a catch:
You can only craft one Augmentation per blueprint you acquire.
So treat each schematic like a limited “ticket.” If you craft a mediocre roll early, you might regret it later.
Which fabricator do you need?
- Advanced Weapons Fabricator for melee/ranged weapon Augments
- Advanced Garment Fabricator for armor Augments
Augments also require advanced materials, including two Chapter 3 staples:
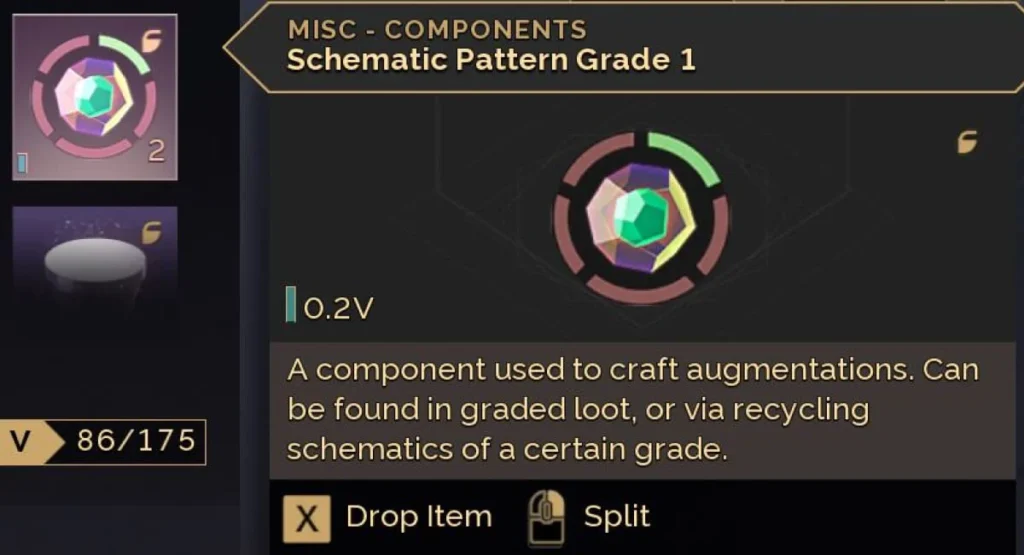
- Schematic Patterns
- Regis Components
Equipping Augmentations (Augmentation Station)
To actually attach an Augment and gain its effect, you need an Augmentation Station.
- It’s a Plastanium-tier placeable
- It requires a large amount of Plastanium Ingots plus Spice Melange (and other mats)
Slot rules (important)
You can only attach Augments to items that have open Augmentation slots. Those slots are unlocked by leveling your Crafting Specialization tree — meaning even if you own the Augment, your gear may not be ready to accept it yet.
Schematic Patterns & Regis Components (materials explained)
Schematic Patterns
Schematic Patterns are used specifically for crafting Augmentations and drop from Challenge Mode Testing Stations.
- They come in Grade 1 to Grade 5
- The grade you earn depends on the Testing Station difficulty you clear
In short: Testing Stations = schematics + patterns.
Offworld Regis Compounds → Regis Components
Regis Components are another core Augmentation ingredient, but they’re a two-step process:
- Earn House Scrip through Landsraad Missions (by claiming Recollection Rewards)
- Spend House Scrip at the Landsraad Crafting Vendor to buy Offworld Regis Compounds
- Convert Compounds into Regis Components at an Advanced Survival Fabricator (with extra mats like Water + processed resources)
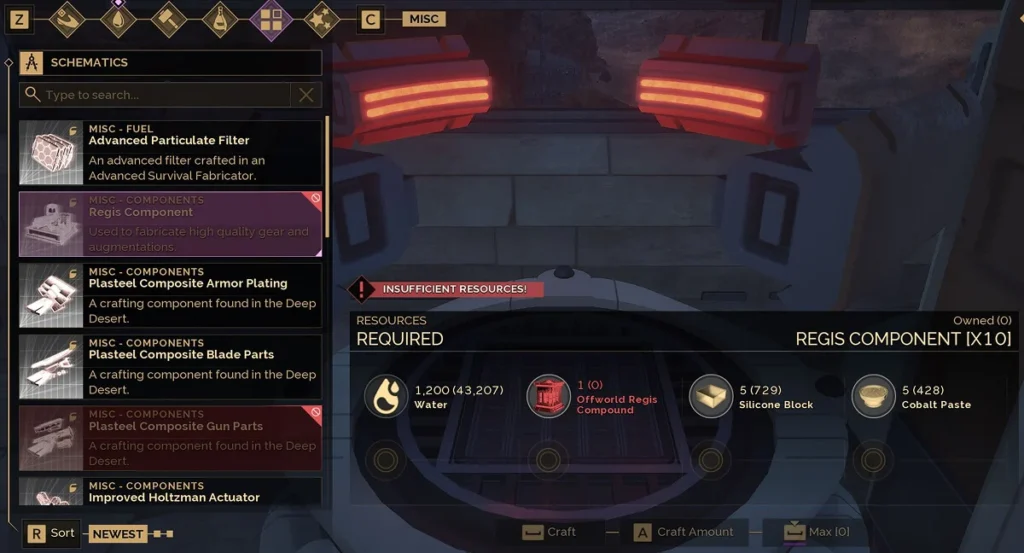
Output note: Each craft yields 10 Regis Components, which is why buying Offworld Regis Compound tends to become your repeatable “Augment fuel” loop.
How Do Augmentations Work?
Here are the rules that matter most:
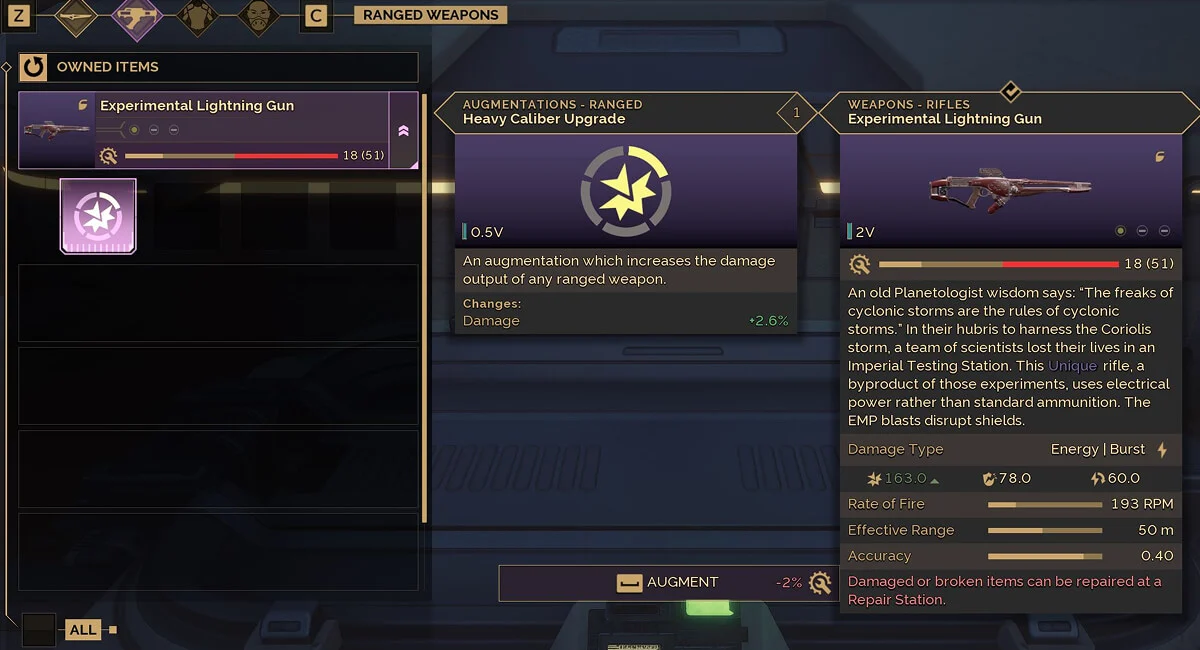
- Augmentations cannot be removed once attached (treat it as permanent)
- They reduce your item’s maximum durability by 2% when attached
- You can only craft one Augmentation per blueprint
- You unlock more Augmentation slots by leveling Crafting Specialization
What this means in practice:
Augments are powerful, but you should be picky. Don’t slap a rare augment onto a “temporary” weapon unless you’re okay locking it in and eating the durability penalty.
Augmentations to Watch (examples)
Until a full meta settles, these are the kinds of Augments players commonly prioritize because they scale hard with higher grades:
- Blade Sharpener: major melee damage scaling (especially at high grade)
- Disruptive Coating: boosts shield damage for ranged setups
- Capacity Expander: more ammo capacity, but adds item volume/weight tradeoff
- Penetrative Reinforcement: defensive tradeoff (reduced dart damage taken, but increased blade damage taken)
- Jabal Spitdart Toxicity Enhancer: huge poison damage boost with a shield-damage penalty
Best “first goals” for most players
If you want a practical starting plan:
- Push into Plastanium (MK6) readiness
- Start clearing Testing Stations for schematics + patterns
- Run Landsraad missions consistently for House Scrip → Offworld Regis Compound
- Convert to Regis Components in bulk
- Invest into Crafting Specialization early if you want more slots
- Only craft/slot Augments you’re confident you’ll keep
If you want, paste your current build focus (melee/ranged/armor role + solo vs group), and I’ll suggest a clean Augmentation priority list + a simple weekly farming loop that fits your playtime.