

Rather than pushing everyone into the same “best build,” Specializations let you decide what role you want to play: the guild crafter, the resource engine, the combat carry for Challenge Mode, or the stealth-focused operator who squeezes more value out of Landsraad systems. You choose your lane or spread out for efficiency.
How to Unlock Specializations in Dune: Awakening
Unlocking Specializations is not a single button press, it’s tied to Chapter 3 systems and your faction progression. Here’s the clean checklist.
1) Reach Faction Level 5
To open the door to Specializations, you first need access to Landsraad Missions (also introduced in Chapter 3). That means reaching Faction Level 5 with either Atreides or Harkonnen.

Fast progression tip: if you haven’t committed to a faction path yet, start with the Anvil questline, then continue through the faction hub chain:
- Helius Gate for Atreides
- Riftwatch for Harkonnen
Once you hit Faction Level 5, you’ll be directed to speak to the key faction contact to receive the House Operator title:
- Thufir Hawat (Arrakeen) for Atreides
- Piter de Vries (Harko Village) for Harkonnen
2) Join a Faction-aligned Guild
You must be in a Guild aligned to your faction. This is a hard requirement for full Landsraad participation and, by extension, Specializations.
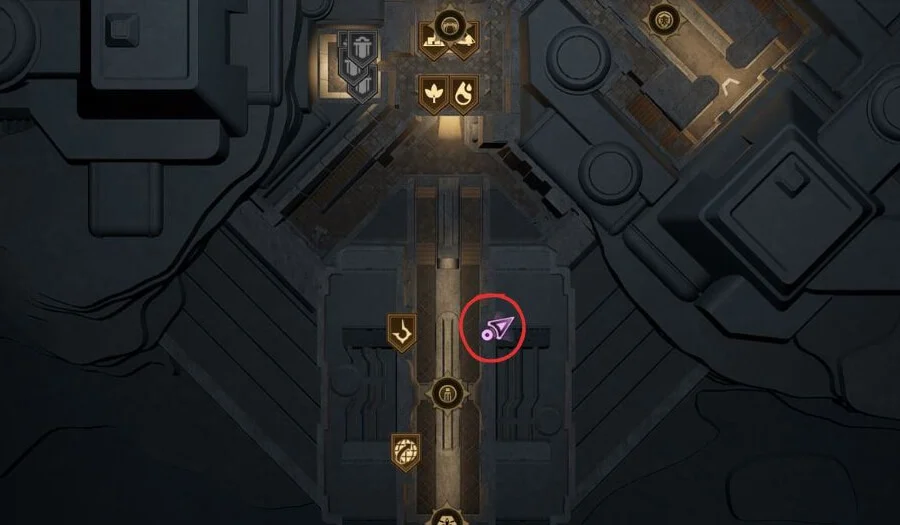
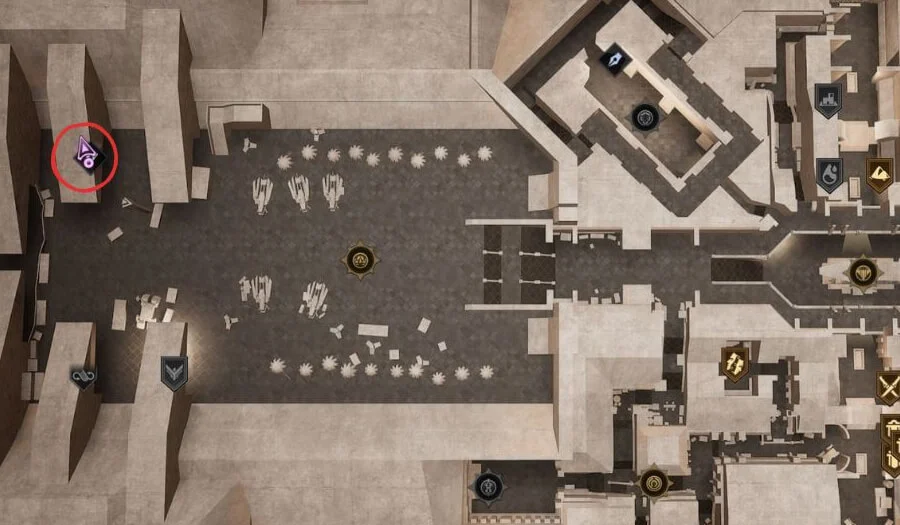
3) Confirm Landsraad access
With both conditions met, you can take Landsraad Missions from the Landsraad menu (hotkey: L).
4) Open the Specializations menu
Specializations live inside the Skills UI:
- Open Skills (hotkey: K)
- Open Specializations (bottom-left; hotkey: G)
Now you’re in.
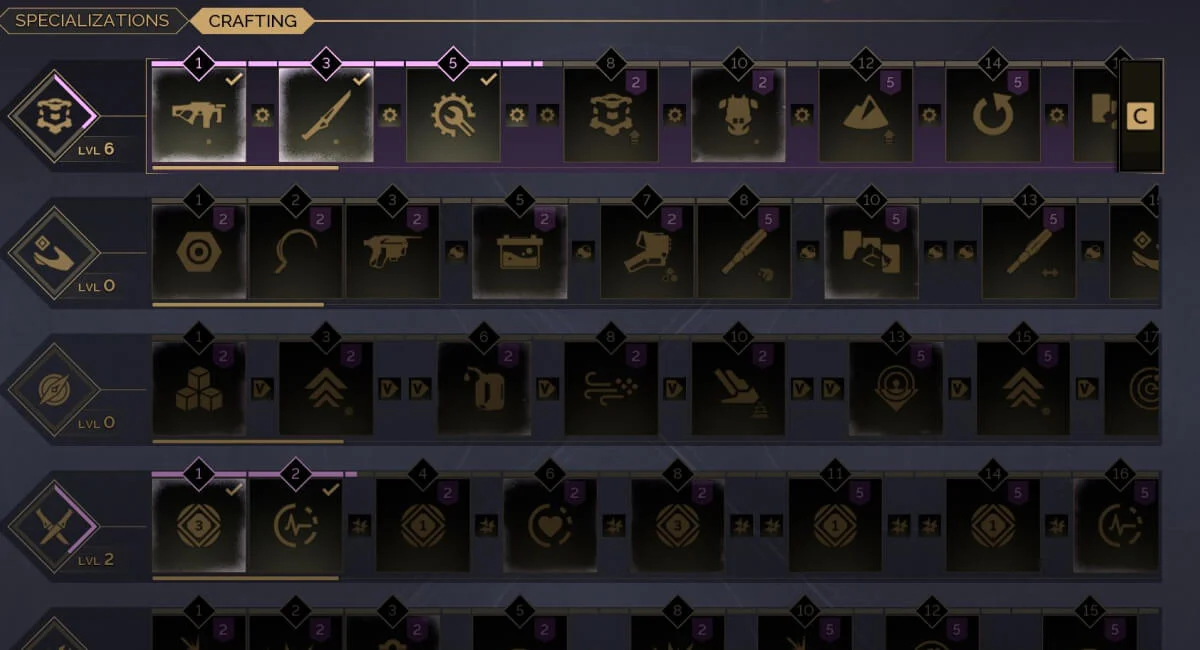
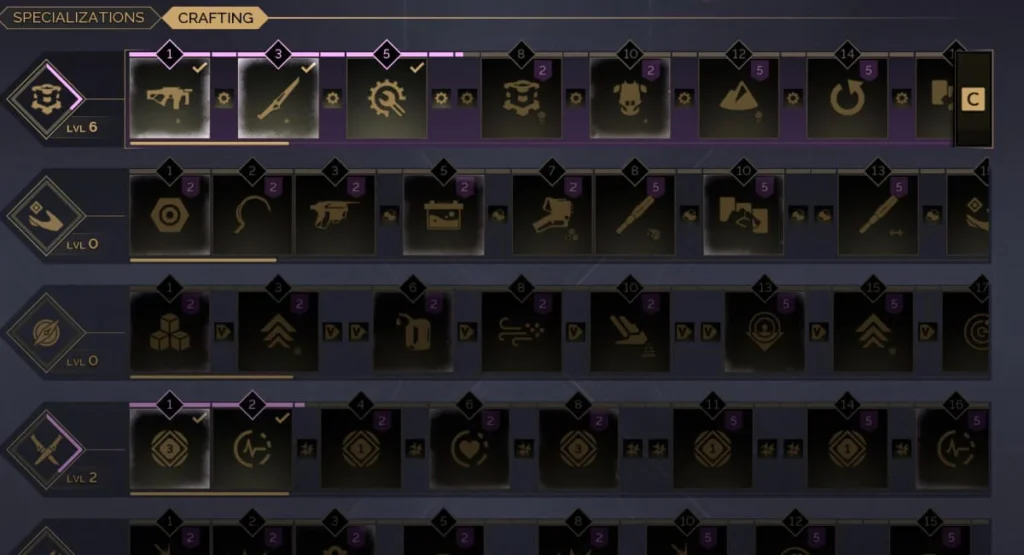
Specialization Categories & Effects
There are five Specialization tracks, each with a distinct purpose. Even if you’re “doing everything,” you’ll feel a difference once you begin stacking passives and key Trait nodes.
Crafting
Best for players who want to be the group’s production machine.
- Higher crafting yields
- Lower crafting costs
- Extra Augmentation slots for weapons & garments (huge power/utility spike)
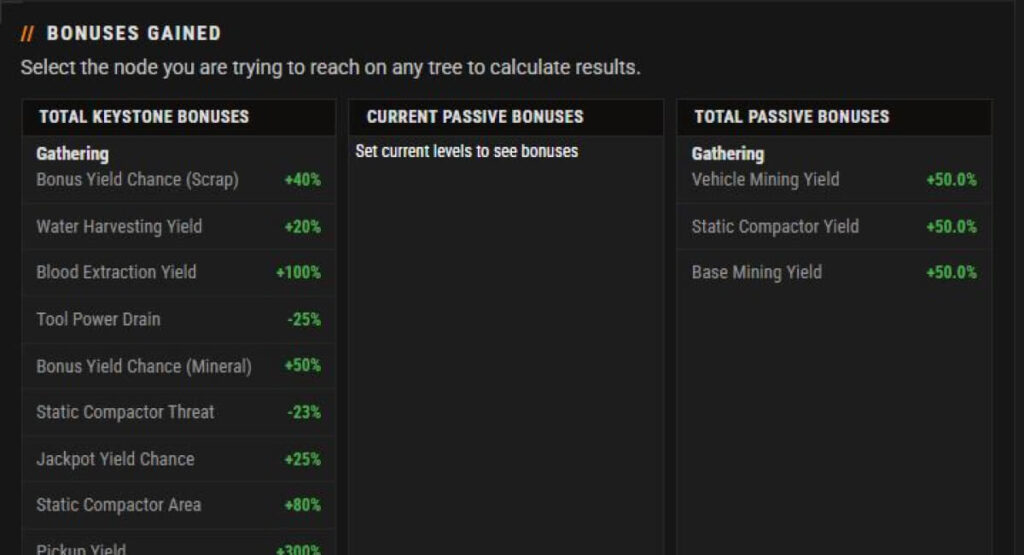
Gathering
Turns you into a resource multiplier.
- Higher gathering yields
- Reduced sandworm threat
- Lower tool power drain
Exploration
Quality-of-life and mobility focused — underrated for fast movers and vehicle players.
- More inventory slots
- Better vehicle fuel efficiency, speed & boost
- Improved surveying
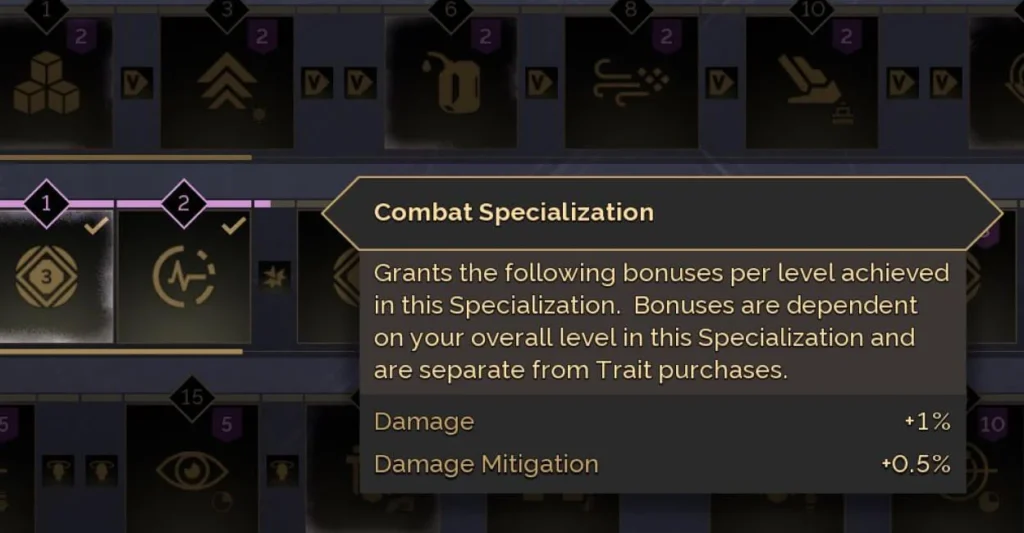
Combat
The raw power track.
- Higher max health & stamina
- More damage + better mitigation
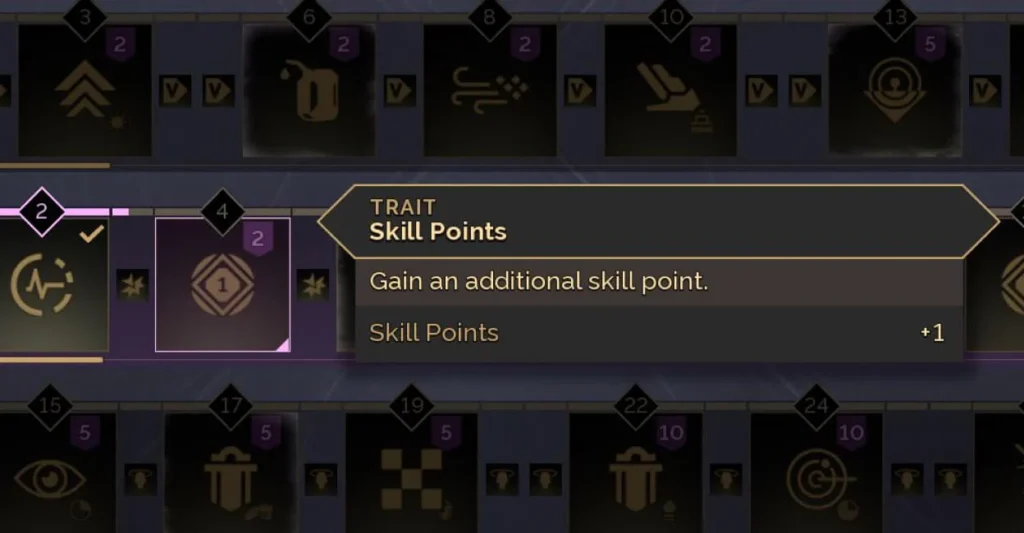
- Additional Skill points (massive for build flexibility)
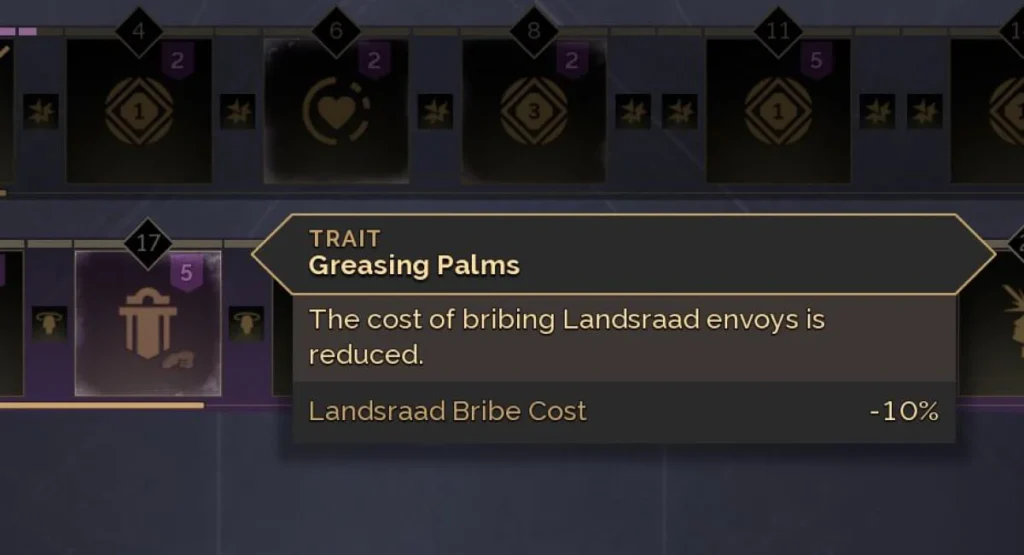
Sabotage
A niche, value-oriented tree with stealth and Landsraad economy advantages.
- Higher headshot damage
- Better Landsraad scrip/bribe/contribution value
- Lower enemy detection
Important limitation: you can complete a maximum of 35 Landsraad Missions per week, so planning which nodes you want early matters.
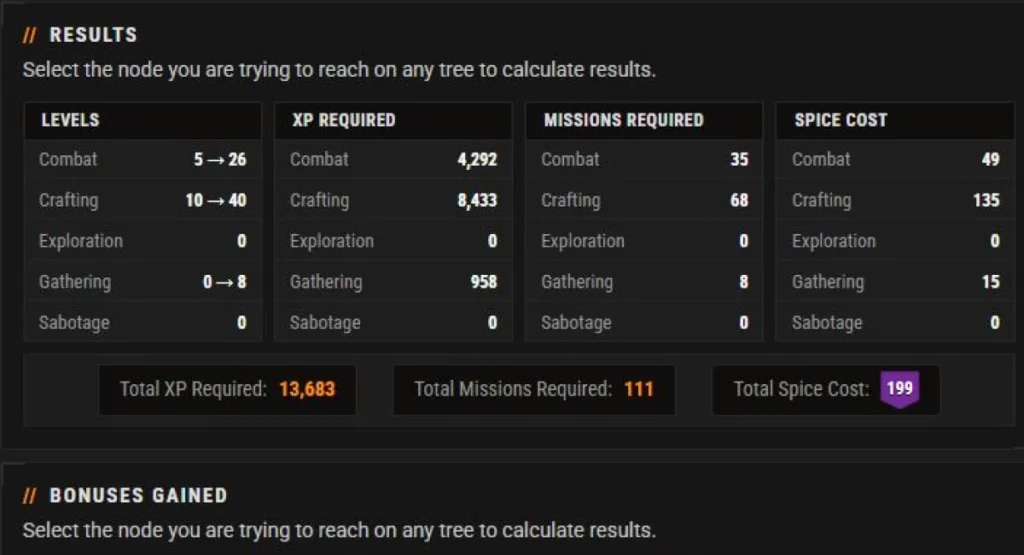
Earning Specialization XP & Unlocking Bonuses
Progression here is a two-currency system:
- Specialization XP (to level the track)
- Spice Melange (to buy major Trait nodes)

How to earn Specialization XP
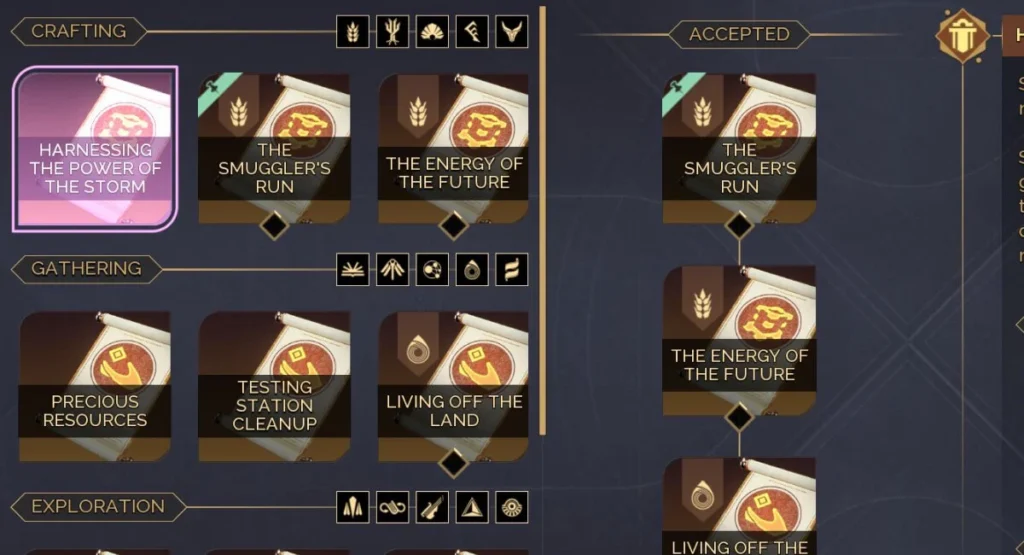
You earn Specialization XP primarily through Landsraad Missions.
Each day you receive 5 Mnemonic Recollections. After completing a Landsraad Mission, you can turn in a recollection for bonus rewards and one of those rewards is Specialization XP.
Key detail: the XP you get is tied to the mission’s category. If you want to level Crafting, pick missions that reward Crafting XP, and so on.
XP optimization: don’t tunnel one tree too early
XP requirements climb steeply at higher levels. Because daily earning has a cap (often discussed as 625 XP/day), it can be more efficient to spread levels across multiple trees early.
Example logic:
- Going from Level 99 → 100 costs nearly as much XP as pushing Level 1 → 5 in a fresh tree
- That means your early weeks can benefit from grabbing “cheap” impactful levels across two or three tracks instead of chasing one max level immediately
Passives vs Traits (and why Spice matters)
Specializations reward two types of bonuses:
1) Passives
- Always-on bonuses that scale with level
- You get them automatically as you level
- No Spice cost
2) Traits
- Large node unlocks on the track
- Must be purchased with Spice Melange
- Costs rise deeper into the tree
- Typically provide the biggest “game-changing” effects
| Level | XP | Level | XP | Level | XP |
| 1 | 100 | 34 | 7,419 | 67 | 23,608 |
| 2 | 205 | 35 | 7,777 | 68 | 24,220 |
| 3 | 315 | 36 | 8,143 | 69 | 24,838 |
| 4 | 431 | 37 | 8,518 | 70 | 25,462 |
| 5 | 553 | 38 | 8,902 | 71 | 26,086 |
| 6 | 681 | 39 | 9,295 | 72 | 26,710 |
| 7 | 816 | 40 | 9,697 | 73 | 27,334 |
| 8 | 958 | 41 | 10,107 | 74 | 27,958 |
| 9 | 1,107 | 42 | 10,525 | 75 | 28,582 |
| 10 | 1,264 | 43 | 10,951 | 76 | 29,206 |
| 11 | 1,428 | 44 | 11,385 | 77 | 29,830 |
| 12 | 1,599 | 45 | 11,827 | 78 | 30,454 |
| 13 | 1,777 | 46 | 12,277 | 79 | 31,078 |
| 14 | 1,963 | 47 | 12,736 | 80 | 31,702 |
| 15 | 2,157 | 48 | 13,204 | 81 | 32,326 |
| 16 | 2,359 | 49 | 13,681 | 82 | 32,950 |
| 17 | 2,570 | 50 | 14,167 | 83 | 33,574 |
| 18 | 2,790 | 51 | 14,661 | 84 | 34,198 |
| 19 | 3,019 | 52 | 15,163 | 85 | 34,822 |
| 20 | 3,258 | 53 | 15,673 | 86 | 35,446 |
| 21 | 3,504 | 54 | 16,191 | 87 | 36,070 |
| 22 | 3,757 | 55 | 16,717 | 88 | 36,694 |
| 23 | 4,017 | 56 | 17,251 | 89 | 37,318 |
| 24 | 4,285 | 57 | 17,794 | 90 | 37,942 |
| 25 | 4,561 | 58 | 18,346 | 91 | 38,566 |
| 26 | 4,845 | 59 | 18,907 | 92 | 39,190 |
| 27 | 5,137 | 60 | 19,477 | 93 | 39,814 |
| 28 | 5,438 | 61 | 20,052 | 94 | 40,438 |
| 29 | 5,748 | 62 | 20,632 | 95 | 41,062 |
| 30 | 6,067 | 63 | 21,217 | 96 | 41,686 |
| 31 | 6,393 | 64 | 21,807 | 97 | 42,310 |
| 32 | 6,727 | 65 | 22,402 | 98 | 42,934 |
| 33 | 7,069 | 66 | 23,002 | 99 | 43,558 |
| 100 | 44,182 |
A common expectation is that fully buying Traits in one tree costs a lot of Spice overall, so most players will want to prioritize the most impactful Trait nodes rather than trying to “buy everything” early.
Best Specialization Tracks by Playstyle
There is no single best route for everyone — your role (and who you play with) changes what “optimal” looks like. Here are strong, practical templates.
Best Specializations for Solo Players
Solo players need two things: reliability and the ability to handle harder endgame PvE content.
Recommended priority:
- Crafting (Augmentation slots + efficiency)
- Combat (survivability + damage + Skill points)
Example early path:
- Crafting to early augment unlock milestone
- Combat to a major Skill point spike node
- Back to Crafting for the next augment milestone
This keeps your power curve climbing while still improving your gear ceiling.
Best Specializations for a Small Group (2–4 players)
Small groups benefit most from specialization roles. You’ll progress faster when one person becomes the engine that feeds everyone.
Suggested role split:
- Gathering main: max yields to supply Spice/Ores for the team
- Crafting main: maximize output, reduce costs, unlock extra augment slots
- Combat-focused players: carry harder content, protect farmers/crafters, push Testing Stations
This setup usually outperforms “everyone builds the same thing.”
Best Specializations for Guild Play
Guilds can afford specialization depth and they’ll get value from tracks that feel weaker in solo.
Guild priority often looks like:
- A few players push Crafting and Gathering early to supply the whole guild
- Most others focus Combat + secondary Crafting
- Sabotage becomes relevant for organized groups, especially when Landsraad bribes and contribution efficiency matter at scale
Sabotage rarely beats Combat/Crafting for day-to-day power, but in a coordinated guild, its Landsraad economy advantages can become genuinely useful.
Closing thoughts
Specializations are one of the biggest reasons Chapter 3 matters in Dune: Awakening. If you treat them like a long-term build plan not just “level whatever” — you’ll get stronger faster, spend Spice smarter, and fit your role in a group far more cleanly. Whether you’re aiming to solo Challenge content or become the backbone of a guild economy, the right track choices will define your endgame.