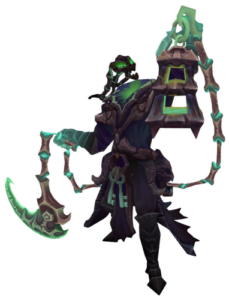
Thresh is a champion in League of Legends played in the Support role, classified as a Catcher (Support / Tank). He uses Mana (274 – 1139.26 at max level) and deals Physical / Magic damage. Thresh was released on January 23, 2013, and was last updated in patch V25.18. Store price: 1575 Blue Essence / 790 RP.
📊 Base Statistics
| Statistic | Base Value | Max Value (lvl 18) |
| HP | 620 | 2979.8 |
| Mana (MP) | 274 | 1139.26 |
| Attack Damage (AD) | 56 | 99.26 |
| Armor (AR) | 33 (FIXED — does not grow) | 33 (only Souls add armor) |
| Magic Resist (MR) | 30 | 60.48 |
| Movement Speed (MS) | 330 | 330 (fixed) |
| Attack Range | 450 (Ranged) | 450 (fixed) |
| Base AS | 0.625 | — |
| Bonus AS | 0 – 68.83% | — |
| Crit. DMG | 200% | 200% |
⚠️ Critical Stat Note — Armor Does NOT Scale: Thresh’s armor is permanently fixed at 33 — it does not increase through leveling at all. His entire armor growth comes exclusively from Soul collection via Damnation. This is not a bug. It means Thresh becomes physically tankier only if he consistently farms Souls throughout the game. A Thresh with 100+ Souls has 133 armor; a Thresh who ignores Soul collection stays at 33 armor indefinitely. Soul farming is mandatory, not optional.
👻 Passive: Damnation
INNATE (1): Thresh’s armor does not increase through growth per level.
INNATE (2): Enemy champions, large minions, and large monsters that die near Thresh drop a Soul for 8 seconds. Epic monsters drop 2 Souls, while lesser minions and monsters have a 33.5% chance to drop a Soul. Thresh automatically collects Souls near him or near a placed Dark Passage lantern.
SOUL BONUS: For each Soul collected, Thresh gains +1 ability power and +1 bonus armor permanently.
💡 Soul Collection Strategy: Souls are Thresh’s entire power scaling system. Positioning matters enormously — staying near minion deaths (even as support) collects souls from the 33.5% random drops. Place Dark Passage lanterns near dying minion waves to auto-collect without risking position. Epic monster Souls (2 per kill) make attending Objective fights a priority for Thresh specifically — every Dragon or Baron kill near Thresh is worth 2 armor + 2 AP permanently
⛓️ Q: Death Sentence
| Parameter | Value |
| Cost | 70 Mana |
| Cooldown | 19 / 16.5 / 14 / 11.5 / 9 seconds |
| Cast Time | 0.5 / None |
| Range | 1100 / 1040 |
| Effect Radius | Global / 3000 |
| Width | 140 |
| Speed | 1900 / 1400 |
| Magic Damage | 100 / 150 / 200 / 250 / 300 (+ 90% AP) |
| Stun Duration | 1.5 seconds |
| Airborne Duration | 0.4 seconds |
| Shackle Duration | 1.5 seconds |
| Slow (while Shackled) | 20% for 1 second |
ACTIVE: Thresh throws out his scythe in the target direction, becoming unable to move or attack while it is in flight. The scythe catches the first enemy hit to deal magic damage, stun and reveal them for 1.5 seconds, and render them airborne for 0.4 seconds. Death Sentence’s current cooldown is reduced by 2 seconds. Thresh also marks the target Shackled for 1.5 seconds, during which he is unable to declare basic attacks and is slowed by 20% for 1 second.
While the target is stunned, Thresh tugs his hook towards him twice — once after a 0.1-second delay and again 0.6 seconds after that. Each tug pulls the target a short distance toward Thresh. After 0.5 seconds of hitting an enemy (or instantly on minion/monster), Thresh can recast the ability while the target is Shackled.
RECAST — DEATHLY LEAP: Thresh stops tugging his hook and dashes to the Shackled enemy, becoming able to attack again upon arrival. He can cast Dark Passage and Flay during the dash
💡 Hook Mechanics Deep Dive: The double-tug mechanic is key — after landing a hook, Thresh automatically pulls the target twice toward him without any input. This means a hooked enemy who Flash-reacts still gets pulled closer even during their Flash animation window if timed incorrectly. The Deathly Leap recast lets Thresh close the gap to assist his team in collapsing on the hooked target — and he can cast Dark Passage (lantern) and Flay mid-dash for a three-ability chain on arrival. Master this dash-into-Flay follow-up and your hook becomes a 3-ability combo rather than a single CC.
🏮 W: Dark Passage
| Parameter | Value |
| Cost | 50 / 55 / 60 / 65 / 70 Mana |
| Cooldown | 21 / 20 / 19 / 18 / 17 seconds |
| Cast Time | None |
| Target Range | 950 |
| Effect Radius | 350 / 150 |
| Tether Radius | 1500 |
| Shield Strength | 50 / 70 / 90 / 110 / 130 (+ 2 per Soul collected) |
| Shield Duration | 4 seconds |
ACTIVE: Thresh throws his lantern to the target location over 0.5 seconds, lasting for 6 seconds while he remains nearby and granting sight of its surroundings. If Thresh moves too far away from the lantern, it returns to him immediately.
Thresh and the first allied champion to come near the lantern are granted a shield for 4 seconds. An ally can select the lantern while in proximity, dashing to Thresh and gaining the shield. An ally cannot select the lantern while immobilized, grounded, or silenced.
💡 Lantern Applications Beyond the Save: Dark Passage is most known as a carry-save tool — but its applications go further. The lantern provides vision of the area it lands in, making it a ward on a 17-second cooldown that can scout bushes before objectives. It also auto-collects Souls near it, letting Thresh farm Souls without repositioning during dangerous wave crashes. The shield scales with +2 per Soul collected — meaning a Thresh with 100 Souls provides a 330+ strength shield per lantern cast. Soul collection directly upgrades W’s shield value permanently.
💥 E: Flay
| Parameter | Value |
| Cost | 60 / 65 / 70 / 75 / 80 Mana |
| Cooldown | 13 / 12.25 / 11.5 / 10.75 / 10 seconds |
| Cast Time | 0.3889 seconds |
| Range | -550 / 525 (behind / forward) |
| Effect Radius | 270 |
| Width | 220 |
| Speed | 2000 |
| Passive Min Bonus Magic Damage (per auto) | 1.7 per Soul (+ 0% AD) |
| Passive Max Bonus Magic Damage (per auto) | 1.7 per Soul (+ 90 / 120 / 150 / 180 / 210% AD) |
| Active Magic Damage | 75 / 120 / 165 / 210 / 255 (+ 70% AP) |
| Knock Distance | 200 units |
| Slow | 20 / 25 / 30 / 35 / 40% for 1 second |
PASSIVE: Thresh’s basic attacks are empowered to deal bonus magic damage, with the AD ratio increasing over 10 seconds without basic attacking enemies. At maximum charge (10 seconds idle), each auto deals 1.7 per Soul collected + up to 210% AD bonus magic damage.
ACTIVE: Thresh sweeps his chain across the ground in a broad line and radius around him, starting behind him and sweeping toward the target direction. Enemies hit are dealt magic damage and knocked 200 units in the target direction, then slowed for 1 second.
💡 Flay Direction Matters Enormously: Flay can knock enemies toward Thresh or away from him depending on direction. After a Death Sentence hook, Flay toward Thresh keeps the enemy in place for your team to collapse. Flay away from Thresh pushes enemies into The Box walls for an immediate 99% slow. The passive auto-attack charge means waiting 10 seconds between autos before a fight starts maximizes the first empowered hit damage — with high Soul counts, a max-charged Flay passive auto hits extremely hard.
📦 R: The Box
| Parameter | Value |
| Cost | 100 Mana |
| Cooldown | 120 / 100 / 80 seconds |
| Cast Time | 0.45 seconds |
| Width | 30 |
| Wall Side Length | 470 |
| Magic Damage (first wall contact) | 250 / 400 / 550 (+ 100% AP) |
| Slow (first contact) | 99% for 2 seconds |
| Slow (subsequent walls) | 1 second only, no damage |
| Wall Duration | 5 seconds |
| Rebreak Cooldown per Enemy | 1 second |
ACTIVE: Thresh erects a pentagon of spectral walls around him that each last for 5 seconds. A wall breaks upon enemy champion contact, dealing magic damage and slowing them by 99% for 2 seconds. After the first wall breaks, the rest deal no damage and slow for only 1 second. Enemies that break a wall cannot do so again for 1 second
💡 The Box Combo Applications: The Box’s 99% slow on first wall contact is practically a root — 0.01% movement speed. Three setups maximize its value: (1) Post-hook: cast The Box around a Death Sentence target immediately after hooking — they can’t escape the wall even if they Flash through it since the walls surround Thresh, not the target. (2) Flay-into-wall: knock an enemy with Flay directly into a Box wall for the instant 99% slow activation. (3) Teamfight zone: cast The Box at a chokepoint or around an objective to force the enemy team to either take the 99% slow or abandon the objective entirely. Every wall breach is a punish.
🎯 Strategies and Gameplay Tips
Early Game (Levels 1–6)
- Soul Collection Priority: Position near minion deaths whenever possible without overextending. The 33.5% Soul drop chance from cannon and melee minions adds up fast over a full laning phase. A Thresh who reaches level 6 with 15+ Souls is already meaningfully tankier than a Thresh with 5 Souls — the difference compounds throughout the game.
- Hook Angles: Death Sentence at 1100 range should never be thrown at the enemy’s current position — throw it where they will be. Predict movement toward minions, toward bushes, toward objectives. The 0.5-second cast time means leading targets by their movement path. Practice in training mode until predicting hook angles becomes instinctive.
- Flay Passive Abuse: Wait 10 seconds between auto attacks to maximize Flay passive charge. An early-game max-charge Flay passive auto into a follow-up E sweep deals significant damage for a support. Establish the habit of counting your idle-auto timer before every trade.
Mid Game (Levels 7–13)
- Hook → Dash → Flay Combo: Land Death Sentence → immediately recast Deathly Leap to dash → cast Flay mid-dash toward the hooked enemy to knock them further into your team. This 3-ability chain triggers in under 1 second after hook landing and leaves the target with 1.5 second stun + knockback + slow stacked simultaneously.
- Dark Passage as Vision Tool: Before Dragon and Baron spawns, throw the lantern into the objective pit for 6 seconds of free vision. On a 17-second cooldown, it’s one of the most efficient vision-per-gold sources in the game at this stage. Also use it to scout river bushes before approaching Baron or Dragon.
- The Box Zone Control: During objective fights, cast The Box immediately when the enemy team approaches to contest. The 99% slow forces a choice: take the devastating slow or abandon the objective. A Box cast at the baron pit entrance can deny an entire team from contesting without Thresh needing to engage at all.
Late Game (Level 14+)
- Soul Count Payoff: A Thresh reaching 80–100 Souls has 113–133 armor — comparable to a tank champion — plus 80–100 AP boosting hook damage, Flay damage, and The Box damage. This makes him a genuine threat in extended fights rather than a pure utility support. Don’t forget you have significant damage output with this Soul count.
- Peel Mode vs. Engage Mode: Decide your role before each teamfight. Engage mode: hook their carry, dash in with Deathly Leap, Flay them into your team, drop The Box around the target. Peel mode: stay glued to your carry, Dark Passage preemptively, Flay any diver away from your ADC, The Box behind your carry to block chase routes. Know which is needed and commit — don’t mix them mid-fight.
- Lantern Carry Saves: In late game teamfights, throw Dark Passage at your carry the moment they take burst damage — not after they’re already low. Proactive lantern placement (throwing it before the enemy commits) means the carry can click it instantly rather than waiting for the travel time during their death animation.
❌ Common Mistakes and How to Avoid Them
- Throwing Q at Current Position: The most common Thresh mistake at every elo. Hook the target’s future position, not where they’re standing. Enemies with functional hands sidestep stationary hooks. Lead movement paths, aim at escape angles, throw at objective approach routes.
- Ignoring Soul Collection: Skipping nearby Soul drops because „it’s dangerous“ is a long-term stats deficit that compounds for 30+ minutes. The 33.5% random drop rate means many Souls are available if Thresh simply stays within collection range. Use the Dark Passage lantern to auto-collect Souls from unsafe positions.
- Using Flay in the Wrong Direction: A Flay that knocks the enemy away from your team wastes the CC entirely and gifts them an escape. A Flay that knocks them toward your team extends the lockdown window. Always confirm which direction the Flay will push before casting — the direction is player-chosen, not automatic.
- Casting The Box Too Late: The Box on a target that already Flashed or dashed through all the walls is 100 Mana and 80–120 seconds wasted. Cast it before the enemy has escape tools available — ideally immediately after Death Sentence connects while they’re still stunned. They cannot break walls during stun, so all walls remain intact when the stun ends.
- Forgetting Deathly Leap Ability Casting: Many Thresh players use the Q recast only as a gap-closer, forgetting that Dark Passage and Flay can both be cast during the Deathly Leap dash. A full sequence of Q hook → W lantern throw → Deathly Leap with Flay cast mid-dash → The Box on arrival chains 4 abilities nearly simultaneously and can alone win a teamfight from a single initiating hook.
⚙️ Recommended Build and Itemization
Core Items
- Locket of the Iron Solari: Active AoE shield synergizes perfectly with Dark Passage passive shield — double shielding your carry with a single action. Provides armor (stacking with Soul armor), health, and ability haste for faster Q cooldown cycling.
- Shurelya’s Battlesong: Movement speed active for engage-mode Thresh — the entire team speeds up for the engage window. Ability haste for faster Death Sentence cooldown. The mythic passive haste means every item after provides more cooldown reduction, accelerating the hook cycle.
- Redemption: Long-range AoE heal that can be activated from anywhere on the map. Drop it during The Box cage moments when the enemy team is slowed by 99% — the heal hits your team while they’re inside and the enemy can’t reposition to avoid it.
Situational Items
- Zeke’s Convergence: Armor, ability haste, and a passive that slows enemies near Thresh after he casts CC on them — layers directly with Death Sentence and Flay slow windows.
- Knight’s Vow: Damage redirection to Thresh from the bound ally. In protect-the-carry compositions, KV turns Thresh into a literal damage sponge for his ADC, amplifying his already-high Soul-stacked armor value.
- Gargoyle Stoneplate: Against heavy burst compositions. The active grants massive bonus HP scaling on bonus armor — and Thresh’s Soul-stacked armor is all bonus armor. This item’s active is proportionally stronger on Thresh than almost any other champion at high Soul counts.
⚔️ Counter Picks & Matchups
✅ Thresh Counters
1. Jinx (ADC pairing)
Jinx has no mobility — she can’t dodge Death Sentence laterally and she stays within Dark Passage lantern pickup range consistently. Thresh’s hook + Deathly Leap allows Jinx to freely activate Get Excited! mobility during the CC window without risk. The Box cage around a grabbed enemy gives Jinx free Rocket damage on a stationary target.
2. Lulu (mirror support)
Thresh outranges Lulu’s Glitterlance poke (1100 vs 950 range), can hook through her Polymorph CC window, and Dark Passage counters Lulu’s Whimsy knockback by giving the tethered ally an immediate escape route. Thresh’s armor scaling through Souls eventually outpaces Lulu’s ability to poke him down.
3. Alistar
Alistar’s engage pattern (W + Q combo) requires walking into Thresh’s hook range to initiate. A pre-emptive Death Sentence the moment Alistar begins his Headbutt animation stops his entire engage pattern. Thresh’s 1100 hook range keeps him safely outside Alistar’s 365 melee range and the Dark Passage lantern provides an instant escape route for the ADC from any Headbutt attempt.
❌ Thresh is Countered By
1. Morgana
Black Shield absorbs Death Sentence’s magic damage stun completely, nullifying Thresh’s primary engage tool. Without the hook connecting on the carry, Thresh has no reliable initiation beyond walking into melee range. Morgana also outranges Thresh in poke (900 vs 450 auto range) and her Tormented Shadow (W) zones Thresh away from Soul collection positions in lane.
2. Nautilus
Nautilus’s Dredge Line hook has the same range as Death Sentence but lower cooldown and his entire kit is harder CC that chains better. His Riptide (E) is an AoE slow + knock that covers Thresh’s approach range entirely. Most critically, Staggering Blow (passive) roots any target Nautilus auto attacks — including Thresh — making the usual Deathly Leap follow-up dangerous to commit to.
3. Blitzcrank
Rocket Grab operates on the same lane control principle as Death Sentence but fires faster (1800 vs 1900 projectile speed), has less telegraphing, and creates more distance between Thresh and the grabbed target. Blitzcrank counters Dark Passage specifically by pulling the lantern recipient away from safety before they can dash. Power Fist also interrupts Thresh’s Death Sentence cast animation by knocking him up mid-throw.
FAQ
Q: How many Souls should I have by specific game stages?
A: General benchmarks for Soul collection — Level 6: 10–15 Souls (good), 20+ Souls (excellent). 20 minutes: 30–40 Souls. 30 minutes: 50–70 Souls. Full game (40+ min): 80–120 Souls. These numbers depend heavily on game state — a Thresh who roams for kills sacrifices Soul farming, while a Thresh who keeps his ADC safe in lane and uses Dark Passage for area Souls can hit these benchmarks consistently.
Q: Can allies be saved by the lantern when immobilized?
A: No — an ally cannot select the lantern (dash to Thresh) while immobilized, grounded, or silenced. This is critical timing knowledge. Throw the lantern before the enemy CC lands, not after. A lantern thrown to a stunned carry is useless until the stun expires. Proactive Dark Passage deployment during the enemy’s commit animation is the entire skill of the ability.
Q: Does Death Sentence go on cooldown if it misses?
A: Yes — missed hooks still trigger the full cooldown (up to 19 seconds at rank 1). This is why hook accuracy is the single most important Thresh skill to develop. A missed Q is a 19-second window where Thresh has no engage, no protection for the carry (no Deathly Leap available), and is significantly reduced in threat. Count your hook attempts and accuracy obsessively.
Q: What direction should Flay push after a Death Sentence hook?
A: Toward your team in most cases — this keeps the enemy in the CC chain (stun → knock toward team → slow) and allows your ADC or mid lane roamer to follow up. Away from your team only if you’re peeling a diver off your carry — in that case, Flay them backward away from your ADC’s position. The key decision: is Thresh currently engaging (flay toward team) or peeling (flay away from carry)?
Q: Is Thresh viable as a non-support role?
A: Occasionally in niche off-meta contexts as a Jungle or Mid pick, but strictly sub-optimal. His base stats and kit are designed around the support role — no wave-clear, support-tier base damage, and all abilities are designed around enhancing ally positioning rather than solo carry potential. The Soul stacking mechanic makes him particularly weak early if he can’t collect Souls near minion deaths, which only happens reliably in bot lane.