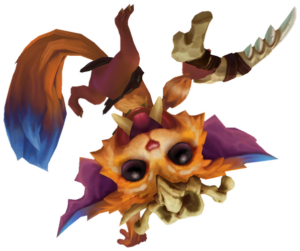
Gnar is a champion in League of Legends primarily played in the top lane, classified as a Specialist (legacy class: Fighter / Tank). The Missing Link uses Rage as his resource (generated through combat, max 100) and deals primarily Physical damage with mixed magic from Hyper procs. Gnar was released on August 14, 2014, and is currently in patch V26.03. With a 49.9% win rate and 4.1% pick rate in Emerald+, Gnar is a staple in both solo queue and pro play. The champion’s dual-form design creates one of League’s most unique playstyles — a ranged lane bully in Mini form who periodically transforms into a melee frontline bruiser capable of game-winning teamfight engages. The catch? The transformation is on a timer, not on-demand. Mastering Gnar means mastering Rage management.
📊 Base Statistics (Mini Gnar)
| Statistic | Base Value | Max Value (lvl 20) |
| HP | 540 | 2093.54 |
| Resource | Rage (100 max) | N/A |
| Attack Damage (AD) | 60 | 122.93 |
| Movement Speed (MS) | 335 | 335 + 0-24 bonus |
| Attack Range | 175 + 225 bonus = 400 | 175 + 336.76 = ~512 |
| Attack Speed | 0.625 | 0.625 + 117.99% bonus |
| Armor (AR) | 32 | 104.76 |
| Magic Resist (MR) | 30 | 55.56 |
📊 Mega Gnar Bonus Stats (added on top of Mini Gnar)
| Bonus Stat | Value (based on level) |
| Bonus HP | +100 – 831 |
| Bonus AD | +6 – 48.5 |
| Bonus Armor | +3.5 – 54.5 |
| Bonus MR | +3.5 – 63 |
| Attack Range | 175 (melee, loses Mini bonus range) |
💡 Unique Mechanic: Gnar has TWO completely different kits depending on his form. Mini Gnar is a ranged (400-512 range) kiting ADC with %max HP shred, while Mega Gnar is a melee (175 range) juggernaut with massive CC and bonus stats (+831 HP, +48.5 AD, +54.5 armor, +63 MR at level 20). The transformation is controlled by the Rage bar which fills through combat. At 100 Rage, the next ability triggers Mega Gnar (or auto-transforms after 4 seconds). Mega lasts 15 seconds, then reverts to Mini with a 15-second Tired phase (no Rage generation). Rage decays after 13 seconds out of combat. Gnar’s entire identity revolves around controlling WHEN the transformation happens — transforming at the wrong moment wastes the 15-second power window, while transforming at the right moment near walls wins games.
🧬 Passive: Rage Gene
INNATE – RAGE GENE: Mini Gnar generates 4 / 7 / 11 (based on level) Rage over 2 seconds upon dealing or receiving damage, up to 100. Against non-champions, basic attacks and Boomerang Throw instantly generate 0.5 / 0.875 / 1.375 Rage. Against champions, Boomerang Throw generates 1 / 1.75 / 2.75 Rage, and basic attacks generate 2 / 3.5 / 5.5 Rage. Rage decays after 13 seconds out of combat.
At maximum Rage, abilities switch to Mega Gnar’s abilities for 4 seconds. Casting any ability during this window instantly transforms to Mega Gnar. Auto-transforms after 4 seconds if no ability is cast. Mega form lasts 15 seconds. Afterwards, Gnar returns to Mini retaining current percentage HP and becomes Tired for 15 seconds (no Rage generation).
MINI GNAR INNATE: Gains 0-24 bonus MS, 225-336.76 bonus attack range (effective 400-512), bonus attack speed, and AS growth (based on level).
| Parameter | Value |
| Rage Generation (combat) | 4/7/11 over 2s (based on level) |
| Rage vs Champions (auto) | 2 / 3.5 / 5.5 instant |
| Rage Decay (out of combat) | After 13 seconds |
| Mega Duration | 15 seconds |
| Tired Phase (no Rage gen) | 15 seconds after reverting |
| Mini Gnar Bonus Range | +225 – 336.76 (effective 400-512) |
💡 Pro Tip: Rage management is the single most skill-intensive part of Gnar. Keep Rage around 70-80 and look for the right moment to hit 100. If you reach 100 Rage at the wrong time (near enemy tower, no fights), you waste the entire Mega window. Good Gnar players intentionally stop attacking near 80-90 Rage and wait for the right moment. Rage decays after 13 seconds, so stay in combat occasionally to maintain the bar.
🪃 Q: Boomerang Throw / Boulder Toss
Cooldown: 16 / 14.5 / 13 / 11.5 / 10 | Cast Time: 0.25 | Cost: None
Mini Gnar – Boomerang Throw
ACTIVE: Gnar throws a boomerang in a line dealing physical damage and slowing for 2 seconds. Returns after hitting enemy or reaching max range, dealing 50% damage to subsequent targets. Catching the boomerang refunds 40% total cooldown. Range: 1125 outgoing / 3000 return.
| Parameter (Boomerang) | Value |
| Physical Damage | 5 / 45 / 85 / 125 / 165 (+ 125% AD) |
| Slow | 15 / 20 / 25 / 30 / 35% for 2 seconds |
| Return Damage | 50% to subsequent targets |
| Catch CD Refund | 40% of total cooldown |
Mega Gnar – Boulder Toss
ACTIVE: Gnar hurls a boulder dealing physical damage and slowing the first enemy hit + surrounding enemies for 2 seconds. Boulder drops on ground after impact. Picking up the boulder refunds 70% total cooldown. Cooldown shared with Boomerang Throw.
| Parameter (Boulder) | Value |
| Physical Damage | 45 / 90 / 135 / 180 / 225 (+ 140% AD) |
| Slow | 30 / 35 / 40 / 45 / 50% for 2 seconds |
| Pick Up CD Refund | 70% of total cooldown |
💥 W: Hyper / Wallop
Mini Gnar – Hyper (Passive)
PASSIVE: Basic attacks and ability hits apply Hyper stacks for 3.5 seconds, up to 3. Third stack consumes all, dealing bonus magic damage (capped 300 vs monsters) and granting bonus MS decaying over 3 seconds. MS is gained when leaving Mega form too.
| Parameter (Hyper) | Value |
| Bonus Magic Damage | 0/10/20/30/40 (+6/8/10/12/14% target max HP)(+100% AP) |
| MS Boost (based on R rank) | 20 / 40 / 60 / 80% decaying over 3s |
| Monster Damage Cap | 300 |
Mega Gnar – Wallop
ACTIVE: Gnar slams his arm down in the target direction, dealing physical damage and stunning for 1.25 seconds. Locked out of movement for 0.25s after cast. CD shared with Hyper.
| Parameter (Wallop) | Value |
| Physical Damage | 45 / 75 / 105 / 135 / 165 (+ 100% AD) |
| Stun Duration | 1.25 seconds |
💡 Pro Tip: Mini Gnar’s Hyper is the primary anti-tank tool. At max rank, every 3rd hit deals 40 + 14% of target’s max HP as magic damage. Against a 3000 HP tank, that’s 460 magic damage every 3 autos. This shreds tanks regardless of armor because it’s magic damage. In Mega form, Wallop’s 1.25s stun chains perfectly after R’s 1.75s wall stun for nearly 3 seconds of lockdown.
🦘 E: Hop / Crunch
Cooldown: 22 / 19.5 / 17 / 14.5 / 12 | Cast Time: NONE | Target Range: 475
Mini Gnar – Hop
ACTIVE: Gnar leaps to the target location, then gains bonus attack speed for 6 seconds. If Gnar lands on a unit, he bounces 500 units further. Landing on an enemy deals physical damage and slows 80% for 0.5s. If Hop triggers transformation, no bonus AS — sends Crunch shockwave instead. Boomerang Throw castable during dash.
| Parameter (Hop) | Value |
| Bonus Attack Speed | 40 / 45 / 50 / 55 / 60% for 6 seconds |
| Physical Damage | 50 / 85 / 120 / 155 / 190 (+ 6% max HP) |
| Bounce Distance | 500 units (on landing on any unit) |
| Slow (on enemy) | 80% for 0.5 seconds |
Mega Gnar – Crunch
ACTIVE: Gnar leaps to target location dealing physical damage on impact. After 0.25s delay, sends shockwave dealing same damage in larger radius. Can still bounce as per Hop if used to transform. CD shared with Hop.
💢 R: GNAR! (Ultimate)
Cooldown: 90 / 60 / 30 | Cast Time: 0.25 | Effect Radius: 475
MINI GNAR – PASSIVE: Hyper’s bonus MS increased to 40 / 60 / 80%.
MEGA GNAR – ACTIVE: Gnar thrusts in target direction, knocking away nearby enemies up to 590 units, dealing physical damage, and slowing 45% after 0.4s delay. Enemies hitting terrain take 50% INCREASED damage and are STUNNED instead of slowed — this is Gnar’s game-winning mechanic.
| Parameter | Value |
| Physical Damage (no wall) | 200 / 300 / 400 (+50% bonus AD)(+100% AP) |
| WALL COLLISION Damage | 300 / 450 / 600 (+75% bonus AD)(+150% AP) |
| Slow Duration (no wall) | 1.25 / 1.5 / 1.75 seconds |
| STUN Duration (wall hit) | 1.25 / 1.5 / 1.75 seconds |
| Knockback Distance | Up to 590 units |
💡 Pro Tip: GNAR! R into a wall = 50% more damage AND stun instead of slow. Optimal teamfight: E (Crunch) in → R toward wall (AoE stun) → W (Wallop 1.25s stun) → Q (Boulder). This locks the enemy team for nearly 3 seconds of CC. The 30-second CD at rank 3 means R is available for practically every teamfight.
🎮 Strategies and Gameplay Tips
Early Game (Levels 1-5)
- Kite in Mini Form: Mini Gnar’s 400-512 range bullies melee top laners. Auto when they CS, Q slow to maintain distance. Every 3rd auto procs Hyper for %max HP magic damage + MS burst to disengage. Against tanks, this chunks 10-14% HP every 3 autos while they can’t reach you.
- Catch Your Boomerang: 40% CD refund on catch reduces effective Q cooldown from ~16s to ~9.6s at rank 1. Always position to catch the return. Missing the catch halves your poke output. Throw toward enemy, sidestep to intercept on return path.
- Manage Rage Carefully: Transforming at the wrong time is devastating. Keep Rage at 70-80, wait for opportunities: jungler gank = transform for W stun followup, level 6 near wall = all-in with R stun. Never Mega near enemy tower with no wave.
Mid Game – Transformation Timing
- R Engage Near Walls: Build Rage to near-100, then E (Crunch) into enemy team near a wall → R toward wall (stun all) → W (Wallop stun) → Q (Boulder). This delivers 600+ damage while stunning for ~3 seconds total. Always fight near Dragon/Baron pit walls, jungle corridors, or tower bases.
- Split Push in Mini Form: Mini Gnar excels at split pushing with ranged harass, Hyper %HP shred, and Hop escape. Push sidelane, kite anyone who contests. If a teamfight breaks out, teleport while building Rage to arrive with Mega ready.
- Avoid Fighting During Tired Phase: After Mega expires, the 15-second Tired window with zero Rage generation makes Gnar weakest. Back off, farm safely, wait for Tired to expire. Enemies will actively engage during this window.
Late Game (Level 14+)
- GNAR! R Every Teamfight: Rank 3 R on 30-second CD is available for every fight. A 5-man wall stun for 600+ damage + 1.75s stun is a pentakill setup. Always position near terrain before teamfights — Dragon pit, Baron pit, jungle walls.
- Mini Gnar DPS If No Transform: If stuck in Mini during a fight, play as ranged DPS: auto nearest enemy, proc Hyper for 14% max HP every 3 hits, slow with Q, Hop to escape divers. With Trinity + Black Cleaver, 2-3 Hyper procs on a 4000 HP tank = 1200+ magic damage.
- 30s R CD Abuse: After a successful R engage, you revert to Mini → 15s Tired → 10-15s to rebuild Rage. By then R is off cooldown. Consecutive teamfight R’s back-to-back — no other ultimate matches this at that impact level.
❌ Common Mistakes and How to Avoid Them
- Transforming at the Wrong Time: The #1 mistake. Mega Gnar is useless if you transform with nothing to fight. Manage Rage at 70-80 and push to 100 only when opportunity appears. If accidentally 100, don’t ability-cast for 4 seconds to auto-transform and preserve CDs.
- Using R Without a Wall: R without wall = 200-400 damage + SLOW. With wall = 300-600 damage + STUN. That’s 50% more damage + crowd control upgrade. Never R in open lane. Walk toward terrain, E + R to push enemies into it.
- Not Catching Boomerang: 40% CD refund on catch cuts effective CD nearly in half. Missing the catch = 16s CD instead of ~9.6s, halving poke output. Always throw Q toward enemy and move to intercept the return path.
- Fighting During Tired: 15-second Tired debuff = no Rage, no Mega, squishy Mini Gnar only. Back off immediately after reverting. Getting caught during Tired is almost guaranteed death against competent opponents.
- Ignoring Hyper Procs: 6-14% max HP magic damage every 3 hits is your primary anti-tank tool. Track Hyper stacks on enemies (visible) and always proc the 3rd hit. Walking away with 2 stacks wastes massive damage.
⚙️ Recommended Build and Itemization
Core Items
- Trinity Force: Optimal first item. AD, AS, HP, ability haste — every stat benefits both forms. Spellblade procs on Q/auto in Mini for poke, on Q/W/R in Mega for burst. 53.5% WR build in patch 26.03.
- Plated Steelcaps: Standard boots. Armor + auto-attack reduction helps Mini Gnar survive AD melee all-ins. Mercury’s Treads vs heavy AP, Berserker’s in favorable matchups for more Hyper procs.
- Black Cleaver: Second core. AD, HP, haste, armor shred passive stacks with Mini’s rapid autos and Mega’s multi-hit abilities. Movement speed on damage helps Mini kite and Mega stick to targets.
Situational Items
- Sterak’s Gage: HP + AD shield on low HP. Procs during Mega all-in for safety. Bonus HP scales Mega’s already-massive pool (2093 + 831 base). Build vs burst comps.
- Wit’s End: AS + MR + on-hit magic damage. Excellent vs AP teams. AS increases Hyper procs, MR scales Mega durability, on-hit adds Mini DPS. Synergizes with Trinity.
- Randuin’s Omen: HP + armor + crit reduction. Against crit ADCs or Yasuo/Yone, makes Mega Gnar unkillable during 15s window. Active slow helps Mega stick after E + R engage.
⚔️ Counter Picks & Matchups
✅ Gnar Counters
1. Volibear
Why: Volibear lacks mobility to reach Mini Gnar at 400-512 range. Gnar kites infinitely with Q slow + Hyper MS procs while %max HP damage shreds his health. In Mega, Gnar out-CC’s Volibear with R wall stun + W Wallop. Volibear’s tower-disable R is irrelevant since Gnar fights in open lane.
2. K’Sante
Why: K’Sante’s complex kit gets countered by Mini’s range advantage. Hyper %max HP magic damage bypasses resistances. GNAR! R can knock K’Sante into walls before he All Outs. Wallop stun interrupts combos. K’Sante’s All Out form is squishy vs Mega’s base stat advantages.
3. Cho’Gath
Why: Cho’Gath is the archetype Gnar destroys. Mini kites permanently, proccing Hyper for 14% max HP every 3 hits. With Feast stacks at 4000+ HP, each Hyper proc = 560+ damage. Cho can never reach Mini without Flash. Mega GNAR! R knocks his massive hitbox into walls effortlessly.
❌ Gnar is Countered By
1. Irelia
Why: Bladesurge Q dashes through minions to gap-close on Mini Gnar instantly, negating range advantage. Passive attack speed out-duels Mini in trades. Defiant Dance blocks Boomerang. In Mega, Irelia dashes out of R knockback or pins Gnar with her own R. Irelia thrives in close-range combat that Gnar tries to avoid.
2. Malphite
Why: Unstoppable Force R engages from beyond reaction range, knockup interrupts any combo. Ground Slam AS slow cripples Hyper proc rate. Granite Shield absorbs Boomerang poke. Post-6, Malphite R onto Mini Gnar = guaranteed kill with jungler followup. Can’t kite the unstoppable.
3. Akali
Why: Shuriken Flip E and Perfect Execution R gap-close through Mini’s kite. Twilight Shroud makes her untargetable, disabling Hyper stacking. Akali bursts Mini from 100 to 0 before transformation. Even vs Mega, Shroud avoids R stun timing and E/R mobility disengages safely.
FAQ
Q: Can I control when Gnar transforms?
A: Partially. Rage builds through combat and decays after 13 seconds. You control WHEN you hit 100 by managing combat engagement. At 100, next ability triggers Mega or auto-transform after 4 seconds. Can’t transform on-demand at 50 Rage or prevent transformation at 100. Skill is building to 80-90 and timing the last points for the perfect moment.
Q: Does Mega Gnar’s bonus HP scale with items?
A: Yes. +100-831 bonus HP is real base HP, scaling with all %HP bonuses (Sterak’s shield, Overgrowth). At level 18, Mega reaches ~2093 + 831 = 2924 base HP before items. With tank items, Mega Gnar can exceed 4000+ HP during the 15-second transformation.
Q: What’s the best combo when transforming during E?
A: Cast E (Hop) at 100 Rage near enemy. Bounce off a unit, transform mid-air into Mega, land with Crunch shockwave. Immediately R toward wall (stun) → W (Wallop stun) → Q (Boulder). This delivers massive damage with ~3 seconds of CC chain.
Q: Why is R cooldown only 30 seconds at rank 3?
A: Because Gnar can only R during Mega form (15-second window). Mega duration + 15s Tired + 10-15s Rage rebuild = ~40-45s between R opportunities. The 30s CD ensures R is always available when Mega is active — the real limitation is Rage timing, not cooldown.
Q: Is Gnar good for ranked/competitive?
A: Gnar is a pro play staple. 49.9% solo queue WR reflects high difficulty ceiling. Excels in coordinated play where teammates follow up GNAR! R engages. In solo queue, the main challenge is coordinating transformation with random teammates. Best in comps wanting frontline engage from top lane.
Q: Max Q or W first?A: Q first in most matchups. Q max: 5→165 base damage, stronger slow (15%→35%), lower CD (16→10s). Maximizes Mini poke and kiting. W second for 6%→14% max HP Hyper scaling. E last (mobility tool). Standard path: Q > W > E for optimal DPS.