

Swarm, officially titled Swarm | Operation: Anima Squad, was a 1 to 4 player PvE bullet heaven mode inside League of Legends. It re-imagined League’s core gameplay by placing players in the futuristic Anima Squad universe, where a squad of fighters defends Final City against endless waves of alien Primordians. Across four maps (four difficulty steps in the story), each run builds toward a boss fight that progresses the narrative and unlocks additional playable fighters.
Swarm launched on July 17, 2024 (Patch 14.14) and ended on August 19, 2024 (during Patch 14.16).
1) What Makes Swarm Different from Regular League
Many traditional League systems do not apply:
- Movement uses WASD (like an arrow pad).
- You can toggle manual aim vs auto aim by pressing C.
- There is no Fog of War.
- Fighters use a different stat system, including several new stats.
- Fighters have an innate and two player-controlled abilities. These do not level with skill points.
- Power mainly comes from powerups, passives, weapons, augments, and equipment choices gained during the run.
- Champion Mastery is not available for Swarm because fighter gameplay differs heavily from standard champions.
2) Playable Fighters and How to Unlock Them
Swarm uses a roster of playable characters called fighters in this context. Fighters are unlocked through progression.
- Available by default: Jinx, Seraphine
- Unlock requirements:
- Leona: obtain Searing Shortbow level 2
- Illaoi: obtain Radiant Field level 4
- Briar: complete The Outskirts in Story mode
- Yasuo: complete Subterranean Lab in Story mode
- Riven: complete The Outskirts on Hard mode OR purchase the Anima Squad 2024 Event Pass
- Aurora: defeat 25 Elite monsters on Hard mode
- Xayah: complete 20 Bel’Veth Trials on Hard mode
3) Queues, Win Condition, and Match Types
Swarm unlocks for players who finish the League tutorial.
Core match details
- Map set: Final City (4 levels)
- Draft type: Free pick, limited selection pool
- Win condition: Survive to 15:00 game time, then defeat the boss
- Typical run length: 20 to 25 minutes real time
Queue types
- Co-Op (XvE): Create a lobby and play solo or with a premade party of 2 to 4.
- Matchmade (4vE): Enter matchmaking as any party size, on a random map. This queue unlocks after finishing all maps on Story mode. Matchmade runs are played exclusively on Hard difficulty.
Multiple players can pick the same fighter. The party leader controls the selected mode and map.
4) Campaign Flow and Difficulty Modes
Swarm’s progression is a single throughline. Unlocks and rewards carry across modes.
There are three difficulties:
- Story
- Hard
- Extreme
Difficulty scaling includes changes like:
- Enemy health: 1x to 3x to 7x
- Enemy attack damage: 1x to 2x to 3x
- Enemy spell damage: 1x to 1.5x to 2x
- Ally gold income: 1x to 1.5x to 2.25x
Enemy wave size and attack volume also increase with more players in the run.
5) Maps in Final City
Swarm includes four maps, each representing a different part of Final City. You must complete one to unlock the next:
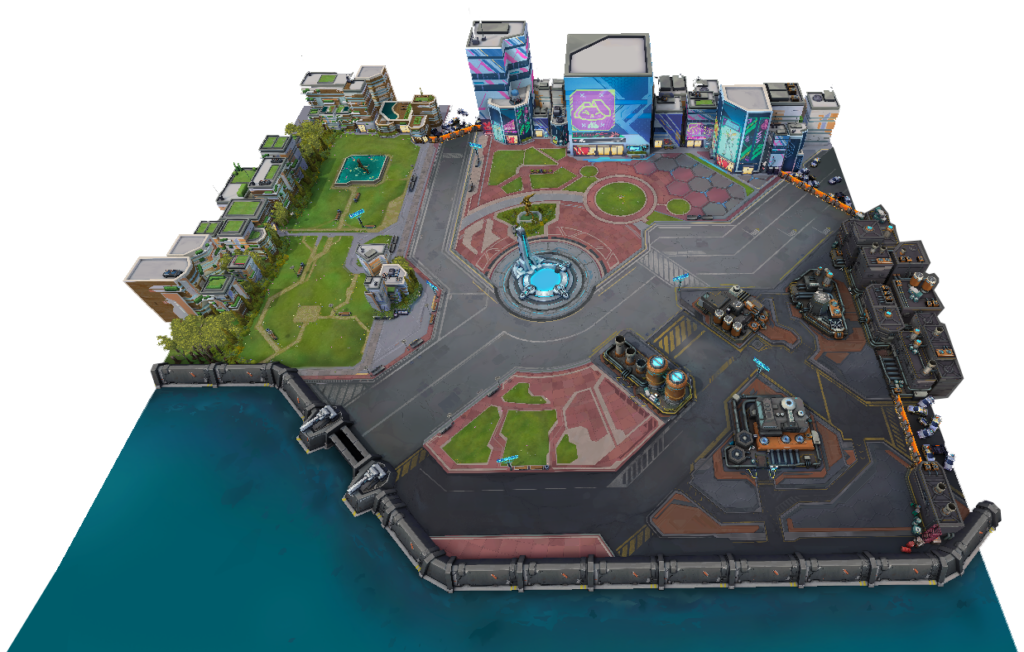
- Warehouse District
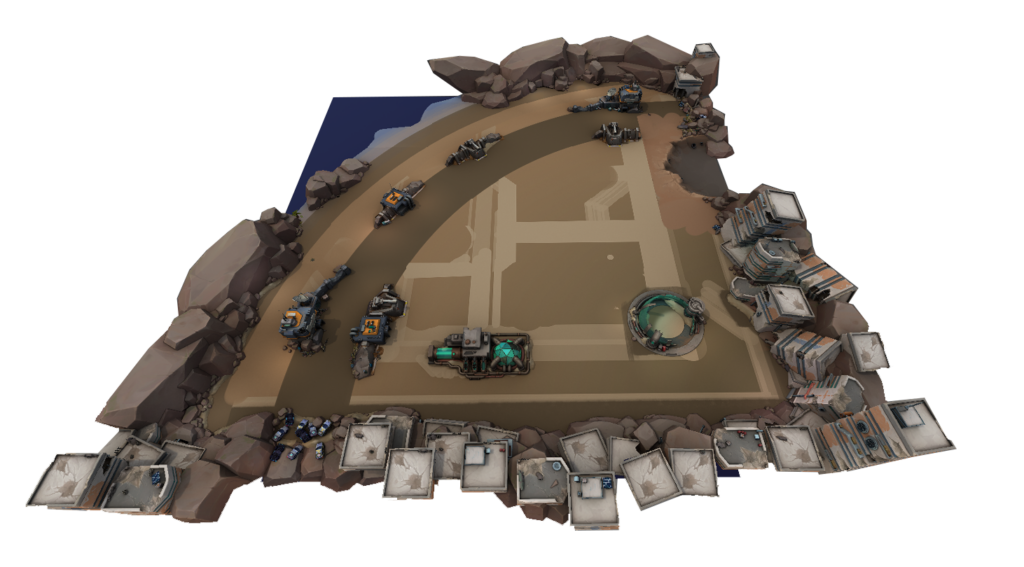
- The Outskirts
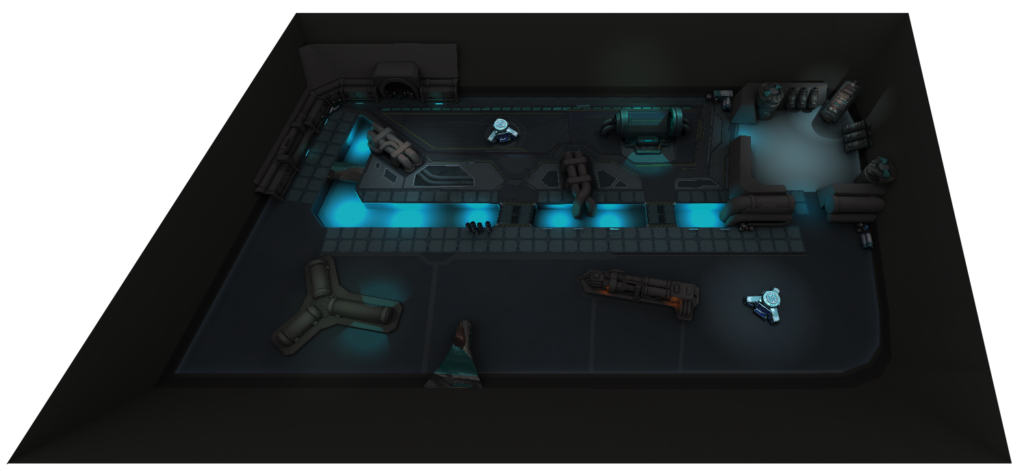
- Subterranean Lab
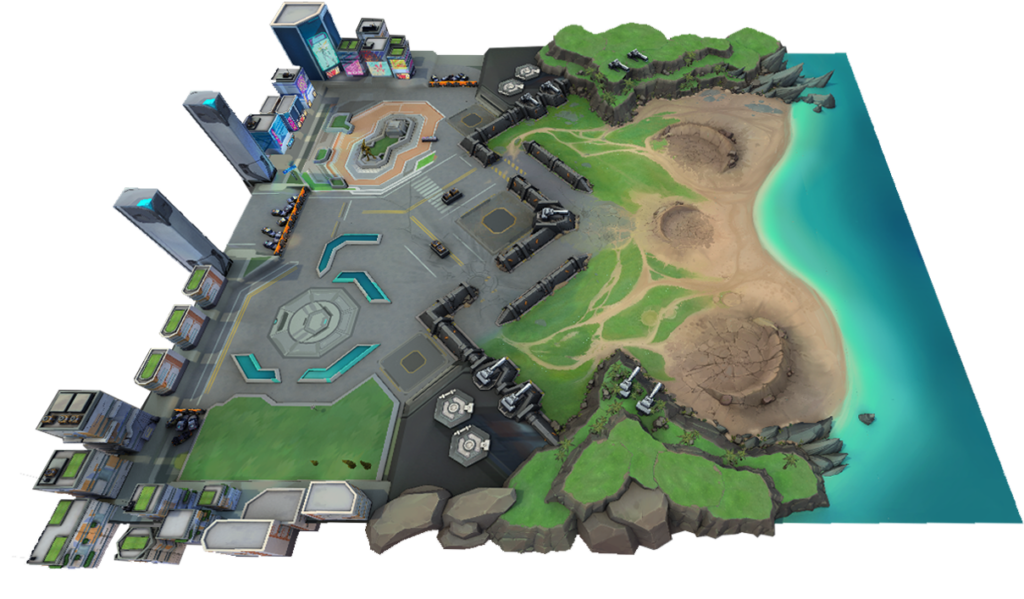
- The Beachhead
Finishing all maps on Story unlocks matchmade queue access, called the Matchmaking Island, where you get a random level on Hard difficulty.
6) Objectives, Rewards, and Long-Term Goals
Objectives drive progression and unlock content. Rewards can include:
- Advancing to the next map by killing each boss
- Recruiting new fighters
- Unlocking new upgrades
- Unlocking additional missions
- Unlocking new passives and passive slots
- Unlocking new weapons
- Champion permanent shards
Completing all objectives in a mode unlocks the next mode. Finishing Story also unlocks fighter-specific objectives that grant extra items.
A notable extreme goal in your notes: defeating Primordian Aatrox on Extreme with every fighter awards the permanent title Swarm Conqueror.
7) Upgrades and Gold Economy (Meta Progress)
Swarm includes Upgrades that boost your fighter from the start of a run. Upgrades are purchased in the lobby using a separate currency called Gold, used exclusively for upgrades.
Important rules:
- Gold earned during a round is kept whether you win or lose.
- The entire team earns the same amount of Gold any teammate picks up.
- Gold sources include Pods, elite and mini-boss kills, Bel’Veth trials, and certain objectives.
Example upgrades from your notes include Damage, Armor, Max Health, Health Regen, Move Speed, Pickup Radius, Area Size, Duration, Critical Chance, Ability Haste, EXP, Projectiles, Gold Multiplier, and Battle Bunny Boon Duration.
There is also Anima Power, a 100-level upgrade that combines multiple stats per level: Ability Haste, Damage, Move Speed, and Pickup Radius.
8) HUD and Information You See In-Game
Swarm uses a custom HUD:
- Teammate portraits show level, health, resource (if applicable), ultimate cooldown, and respawn timer.
- A small bar shows CS and Gold earned during the run.
- The top Game tab shows time and mission timers, switching to boss health during boss fights.
- The scoreboard key (TAB) opens an overlay with fighter stats, a weapon evolution guide, and teammate loadouts (passives, weapons, levels).
9) Environment, Terrain Types, and Interactive Objects
Final City is an advanced industrial city on an isolated island, surrounded by Primordian ocean and thick walls. It includes roads, skyscrapers, storage areas, elevated platforms, and plazas, with some natural terrain outside city zones.
Swarm terrain types:
- Structural: most common, projectiles pass through it and dashes can cross.
- Gate: blocks passage completely and can appear during events like trials or boss fights.
- Border: the edge of the map.
Pods
Pods are destructible objects with 100 health that drop one of several random effects:
- a small amount of Gold
- a healing pack that restores 20% max health to all teammates
- a vacuum orb that pulls in EXP orbs and Gold for a short duration
- a sea mine pickup that detonates for heavy area damage
Megastructures (map-specific tools)
Each map features a major structure that helps the team survive:
- Warehouse District: Healing Fountain, charges while players stand on it and heals the team for 50% max health, then goes on a long recharge.
- The Outskirts: Ion Cannon, fueled by carried fuel cells and fires powerful lasers for 30 seconds.
- Subterranean Lab: Freeze Bomb, activated via platforms and stuns enemies in a large radius.
- The Beachhead: Primordian Ocean used by Primordian Aatrox to flood the map during his boss sequence, forcing relocation. Contact with the flood deals repeated damage over time.
BB01 Helper
An NPC version of Commander Fortune roams the map, occasionally attacking enemies and sometimes firing a bullet storm.
10) Revival Rules
In non-solo runs, dying puts a fighter into a downed state. Teammates can revive by stepping into the marked circle after the downed timer. On revival, the revived fighter gains 4 seconds of invulnerability.
If not revived:
- the fighter respawns after a respawn timer
- respawn health is 50% max health
- downed timer is 10 seconds
- base respawn timer is 15 seconds, increasing by 9 seconds per death, up to 60 seconds from the fifth death onward
If all teammates are downed, the run ends in defeat.
11) Access Cards and Selection Screens
Elites and mini-bosses drop Access Cards. Picking one up grants the entire team an extra free selection screen. This screen offers a single option and can sometimes offer a weapon evolution if conditions are met.
If there are no passives or weapons left to improve, the selection changes to two utility options:
- restore 25% max health to all allies
- grant 25 Gold to all allies
12) Spires and Optional Missions
At random times, a featured character announces an optional mission and spawns a spire on the map. Standing in the capture radius captures it, faster with more teammates. Completing spire missions changes the run’s development and grants bonuses.
Types of spires:
- Commander Fortune Boosts: capture spire, gain a temporary team-wide Battle Bunny Boon
- Assistant Yuumi Quests: playful mini-game tasks, reward a permanent team-wide Augment (usually with both upside and downside)
- Primordian Bel’Veth Trials: harsher events or combat missions with negatives, rewards include large EXP and Gold and multiple Access Cards
13) Boss Fight Rules
At 15:00 game time, the boss arrives. The fight continues until the team wins or is defeated.
Bosses have an enrage system:
- After 5 minutes from spawning, the boss becomes enraged, increasing damage by 20% for 30 seconds and glowing.
- If not killed by the end of that window, the boss unleashes a lethal nova that kills all fighters.
- For Primordian Aatrox specifically, the 5-minute timer restarts when his second phase begins.
14) Combat, Leveling, Passives, and Weapons
Enemies drop EXP orbs that get pulled toward fighters within pickup radius. EXP is shared team-wide, and leveling pauses the game to present a selection menu (up to three offerings) that grants Passives or Weapons. Players have up to 30 seconds to pick, and the game resumes after everyone locks in.
- Levels cap at 99
- Each level-up grants 10 Gold
Passives
Passives grant stat bonuses. Fighters start with 3 passive slots, expandable up to 6 via objectives:
- In Story: select 3 passives in one game
- In Hard: select 4 passives in one game
- In Hard: defeat Bel’Veth on Subterranean Lab
Passives can be stacked by selecting them again. If all slots are filled, new passives are not offered. Passives also enable weapon evolutions, depending on the weapon.
Weapons
Weapons fire automatically. Fighters start with a Signature Weapon, and can add up to four more weapons via selections. Weapons level up by re-selecting them.
Evolutions can be offered through Access Card selection screens when:
- the weapon is max level (5), and
- you have at least one level in its evolution stat via a passive
